A staircase makeover can breathe new life into your home, as it is the first architectural element you and your visitors will see when entering your house. It's a chance to express your personality and create a welcoming and stylish entryway.
Today's post is about how we transformed this dull and outdated staircase to bring new life to the staircase, the foyer, and our entire home!
Slowly but surely, I've been working on updating the second level of our home. The kids' bathroom got a makeover, the linen closet was rearranged, the rooms and hallway were painted, and the last part of this transformation was installing hardwood floors on the entire level.
The hardwood floors were installed, and simultaneously, the staircase was completely transformed!
Let me give you the ins and outs of this project.
THE OLD STAIRCASE
When I listed the changes I wanted to make to our second level last year, I didn't include a staircase makeover. In the overall list of projects around our home, I knew I had to do something to our foyer, but I hadn't thought about a staircase transformation. I guess the price tag of such a project kept me away.
However, while planning the hardwood installation, I had to decide how to wrap the wood planks around those staircase railings/posts up there. The more I thought about it, the more I convinced myself to up the budget and go for a complete staircase makeover.
THE PLAN
A complete makeover was the plan. It included:
- Removal of the wall frame and art piece.
- Patch and paint walls and ceiling.
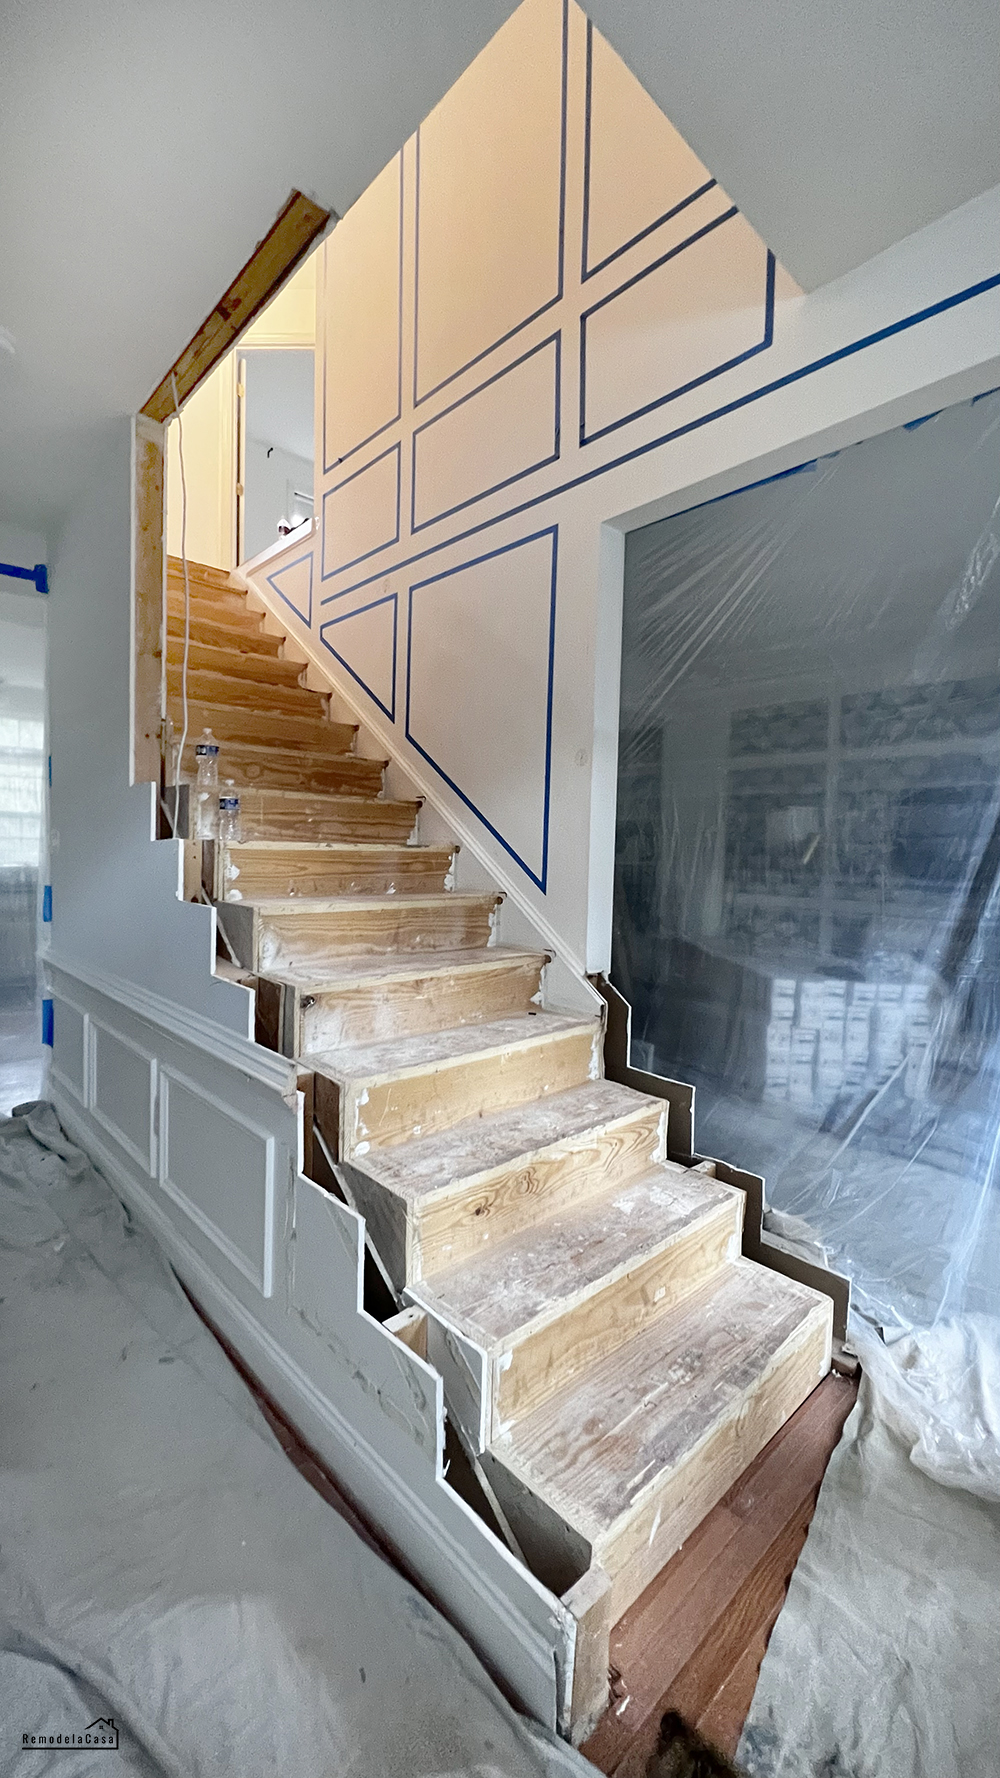
- Open up the staircase by removing a portion of the wall.
- Update the entire staircase: Posts, railing, balusters, treads, and raisers.
*This post contains affiliate links for your convenience. Click here to read my full disclosure policy.
PREP WORK
The double wall frame and art were removed, and here I was, up the staircase, patching and painting this cave.
The opening of the staircase needed some thoughtful consideration, as you need to be certain this isn't a load-bearing wall.
As you can read in this post HERE, there are many ways to identify load-bearing walls. However, if you are unsure, the best bet is to review your home's blueprints or consult a home inspector to determine whether a wall is load-bearing.
Having a green light on the non-load-bearing capabilities of this wall, I traced the area to be removed.
I highly recommend keeping a folder to save all the staircase documents at the ready. I had pictures and handwritten plans of our old staircase, including the lower and upper views and dimensions. Believe me, when you're out there shopping for supplies, you forget how many stair treads you need!
Once again, I used Benjamin Moore - Chantilly Lace on the walls and ceiling, and here is the white canvas I ended with.
In my previous post, I wrote about being my own general contractor for this entire project. I was in charge of all the prep work, getting the materials and tools, and taking care of the final touches or finishing details.
I hired out the installation of the hardwood floors and the complete staircase makeover, including removing the old staircase.
Waiting for the workers to arrive took longer than expected compared to the initial date they gave me. In hindsight, it worked for me because I'm a slow poke.
I even started designing the wall frames for that huge staircase wall, but this is for another blog post!
It was also a good time to find and learn all I could about staircases, decide on the staircase style I wanted, and, most importantly, buy the materials and tools needed for this job.
I was going for a clean-line, modern staircase in white oak.
The following are the main materials I bought for the staircase makeover:
- White Oak Hardwood Stair tread
- White Oak Hardwood Stair tread with return
- Painted white raiser 12' x 8-1/4" x 1/2" I bought it by foot locally.
- Newel posts
- Railing
- White Oak Bullnose Landing. tread (5-1/5" x 48")
- 1/2" Square Iron Hallow Baluster
- Handrail bracket
- Newel post fastener
- Angled staircase handrail to newel post connector - Lower connection
- Angled staircase handrail to newel post connector - Upper connection
- Railbolt - Connect handrails to staircase fittings and newels
- Square hole drill bit, 1/2" -2pcs
- 1-1/2" Forstner bit
- Premium adhesive
PREP & FINISH ALL THE STAIRCASE MATERIAL
The orders started to arrive; I bought the railings, newel posts, and 1/2" square iron balusters from StairPartsUSA.com. It all arrived well-packed and FAST! I was surprised to get it delivered three days after I ordered it.
The White Oak treads and bullnose landing were bought at Blackford & Sons Hardwood Stair Treads - awesome products, but shipping took over a month.
All the staircase material came unfinished, which meant I had to finish it trying to find a perfect match for the hardwood flooring we were installing on the upper level.
I set to work on applying the protective finish to the planks. In this case, I used Bona Traffic HD Raw to match the raw finish on the hardwood planks.
A primer was first applied, followed by a light sanding. Then, three coats of Bona Traffic HD raw were applied to the 15 treads, four posts, 22 feet of handrails, and three 48" bullnose landing treads. Again, this lengthy process must be explained in a separate blog post.
DEMO
Demo day was finally here!
Those guys hung plastic curtains to contain the dust in the foyer and started ripping the red oak planks off the staircase.
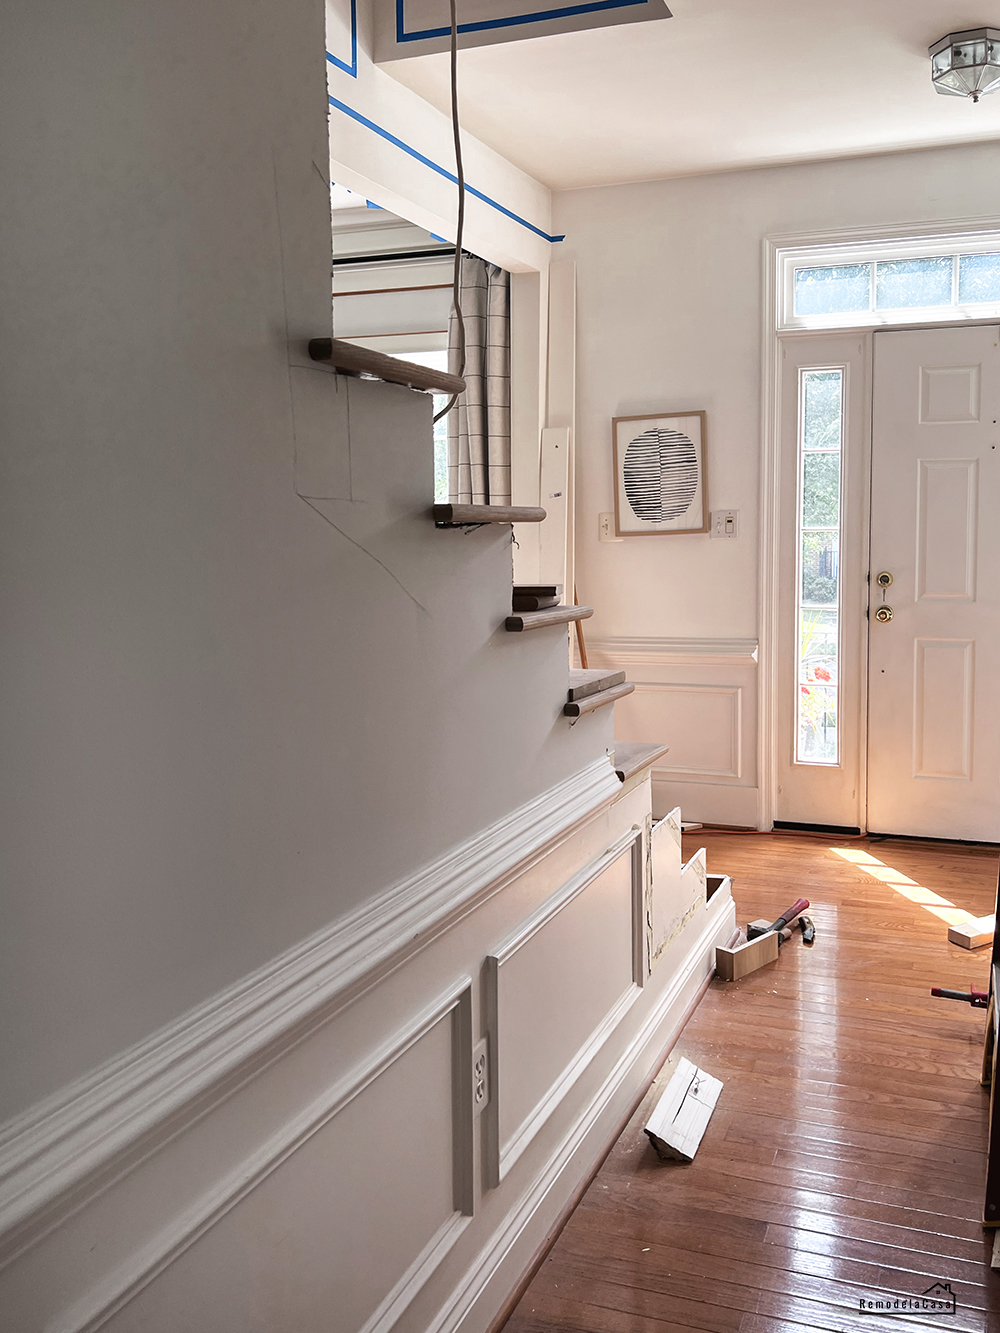
Soon after, they opened up the staircase by removing a big chunk of the wall and trimmed the front part following the contour of the steps.
Using 2x4 scraps I had in the garage and from the demo, they filled up those empty spaces on both sides, making them flush with the steps. Oh, they also redirected that electrical cable.
Next was measuring, trimming, and installing the staircase treads and risers. I have no pictures of this step because I was probably on one of those quick trips to Home Depot to get something.
Next was the newel-post installation, which also went smoothly thanks to having the proper tools and installation hardware.
This is how the 1/2" iron balusters look in place. That piece of wood on the floor is the bullnose landing tread; I love that it is flush with the flooring.
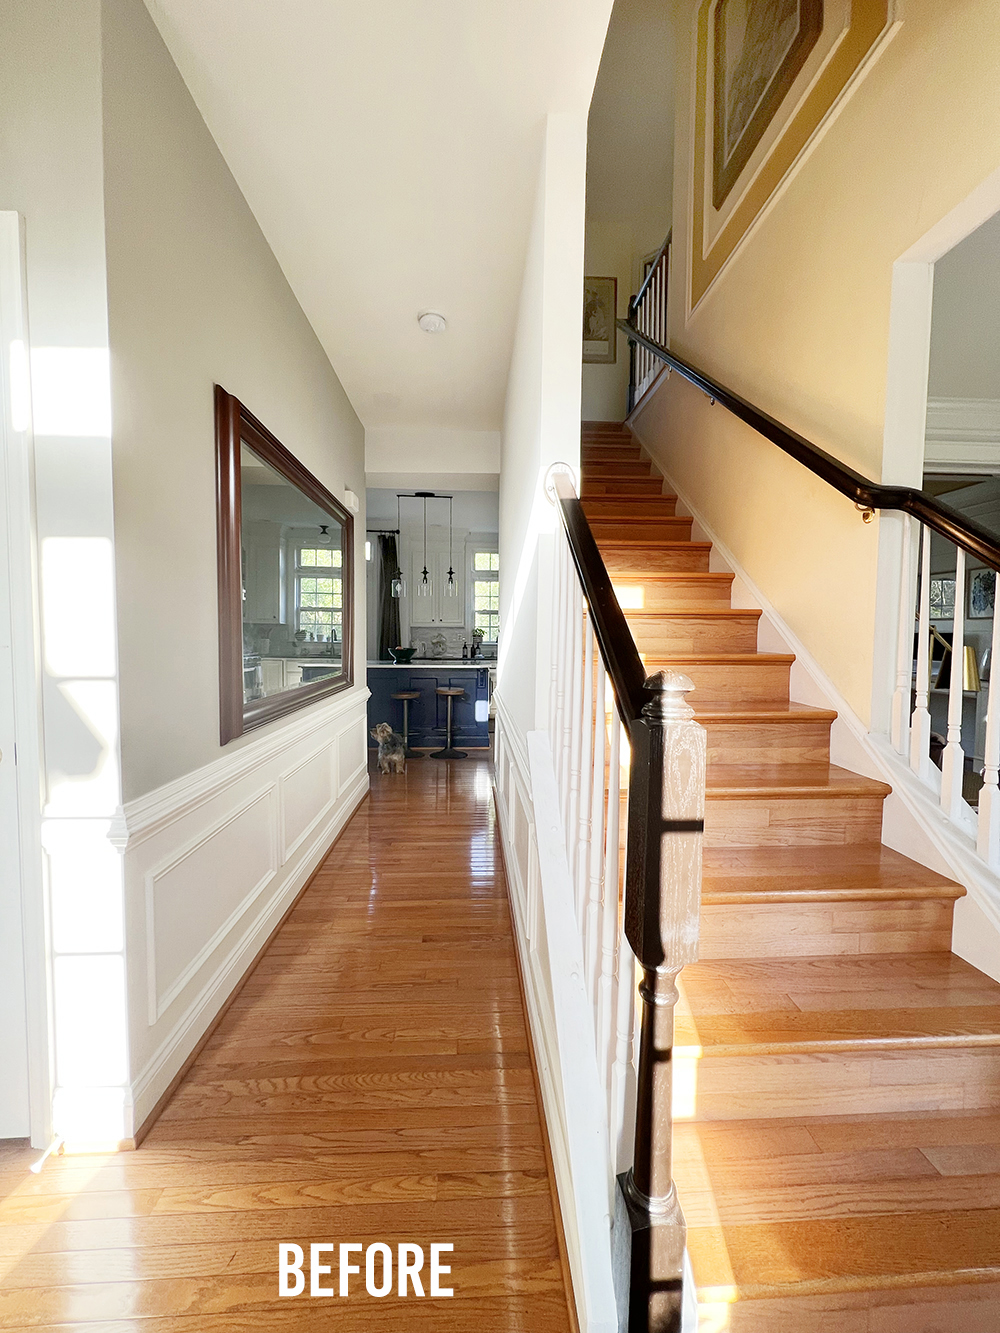
Remember the initial old staircase picture when you opened this page?
Next was the newel-post installation, which also went smoothly thanks to having the proper tools and installation hardware.
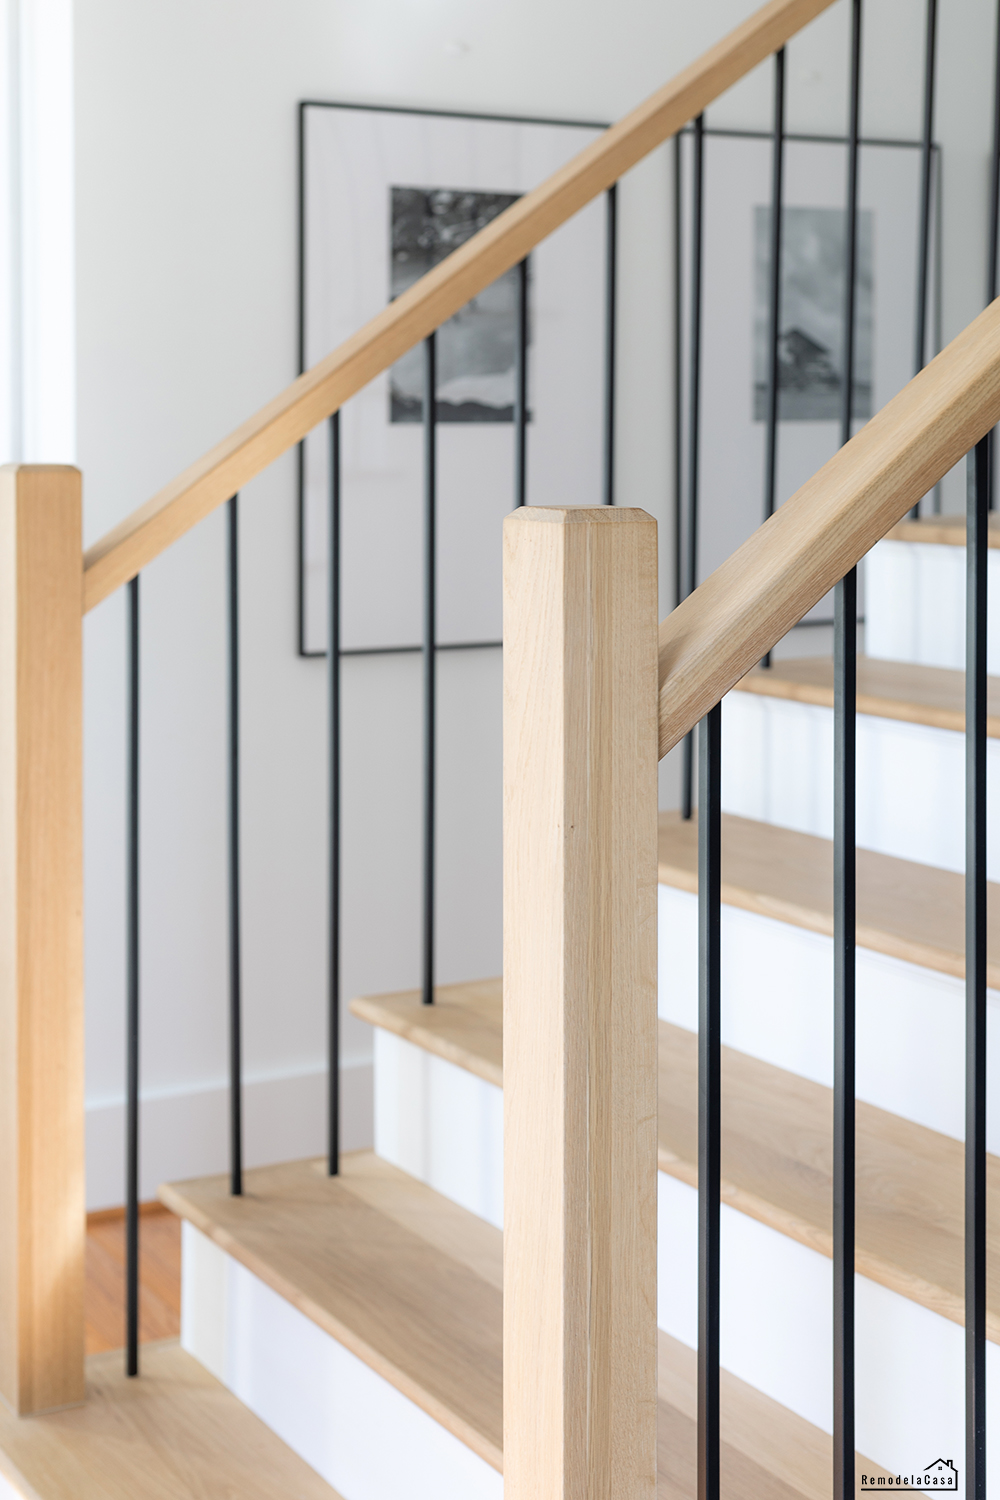
The handrail and balusters were the last pieces of this puzzle! They are plain "2x4" handrails holding 1/2" square iron balusters.
I wanted to omit the use of baluster shoes for this clean-lined staircase style. I was prepared with a few 1/2" square hole drill bit sets to work on all the square holes we needed to open, and they worked wonders!!
Now, I was blown away at how my team worked on this setup. If I were working on this, I would've opened square holes on both the bottom of the handrail AND the floor. NOPE.
They only opened 1/2" squared holes on the bottom of the handrail.
Since the iron balusters have a round pointed end, round holes were drilled into the floor, and that pointed end was installed there. The square end of the baluster was the one to be trimmed to fit.
They went through three sets of square drill bits, as white oak is a hard material, and those bits dulled quickly.
This is how the 1/2" iron balusters look in place. That piece of wood on the floor is the bullnose landing tread; I love that it is flush with the flooring.
Remember the initial old staircase picture when you opened this page?
Well, this next picture is the after!
An airy, modern staircase that brings the style of our home up to today's standards.
And the after with the updated hallway and kitchen island.
I adore the clean lines of the newel posts with the chamfered top detail.
The handrail is another contemporary detail of this staircase. I call them high-end 2x4s because they are as plain as you can get them but very smooth. My hand loves to feel the soft, round edges when going up or down the steps.
Let's take a look at some before and after pictures of this staircase makeover.
This is the before with the living room in the background.
The after, all opened up!
As stated earlier, I was in charge of the finishing details, installing the baseboard, shoe molding, filling holes and cracks, priming, and painting the staircase.
Ha, that was quite a task!
So much so that I haven't finished. :D
A few days ago, after taking the above picture, I went ahead and caulked all those gaps where the risers meet the stair treads.
I installed a small trim to cover the gap between the treads and the top of the risers. It still needs a line of caulk. And I also need to finish installing the returns if you didn't notice that in the previous picture.
I applied three coats of clear polyurethane to prevent scuff marks on the risers.
Guess what?
It works!!
Although I wasn't paying close attention, I had a few poly runs I'll have to sand down and recover.
Here's another "before picture" with the kitchen in the background.
The new white oak floors (upper level & the staircase) don't match the red oak flooring on our main level. I was very aware of this situation, but that is one of the following projects on the to-do list: It will be a refinishing job to bring down that orange color.
The cost of the main materials was around 4K, not including main tools, painting, patching materials, or labor, which varies by location.
- 4-Newel posts, 22 feet of handrail & Iron balusters: $1,816.29
- 15 white oak hardwood stair treads (double, left, and no returns), bullnose landing treads: $1,311.66
- Risers: $218.23
- Bona natural seal, Bona Traffic HD Raw, pads: $217.81
- Zipbolt hardware, handrail brackets, square drill bits: $206.31
I had a team of three strong guys working on the hardwood flooring installation and the staircase makeover, and they finished the job in four days. Well, that final day was extra long, as they were scheduled for another job the following day.
That concludes this staircase makeover. I hope it is helpful to anyone considering a staircase remodel.


Wow, Wow, Wow! Obviously there's nothing you can't do! What a beautiful difference. The lighter wood looks so nice with the white paint. Great job!
ReplyDeleteHaha I wish! The prep work and finishing details were enough for me. All the tough stuff was handed to the pros who did an outstanding job. Thanks so much for stopping by and for your kind words, Sue. ❤️
DeleteHello Cristina, I love all your makeovers and you are one person or blogger that I've kept following because we seem to have the same styles. Great Job.
ReplyDeleteThat's so fantastic to hear! I love finding kindred spirits. Thanks for following along and for the kind words about the makeovers :) What's your favorite kind of look to create?
DeleteOh my goodness! It’s so pretty! I wish I had stairs!
ReplyDeleteThank you! We're so happy with this makeover. 😊
DeleteWOW! The change is a night and day difference. Love it!
ReplyDeleteHi Guerrina! So happy to hear from you. Thank you, girl. ❤️
DeleteSimply gorgeous — and, I love your tip about polyurethane on the risers!
ReplyDeleteThank you, Mary Ann! I was a bit skeptical, but I had to give it a try, and I'm so glad I did. I haven't noticed a single mark on those risers yet.
DeleteWOW!!!!! You sure had a vision and whew did it work out beautifully. I cannot even believe what a difference this change has made to your entire first floor's aesthetic. WELL DONE. Came over from Marty's Inspire Me Tuesday - and so glad I saw this post. It's gorgeous.
ReplyDeleteAww thank you so much, Michele! I love to see this new version each time I open the front door, it made a huge difference. Thanks for stopping by and for your kind comment.
DeleteHow did you accomplish the nice clean transition with white risers to side wall? Is that drywall with smooth finish? It looks so seamless.
ReplyDelete