Do you have old canvases that have seen better days? Or they don't go with your style anymore. Let's update them!
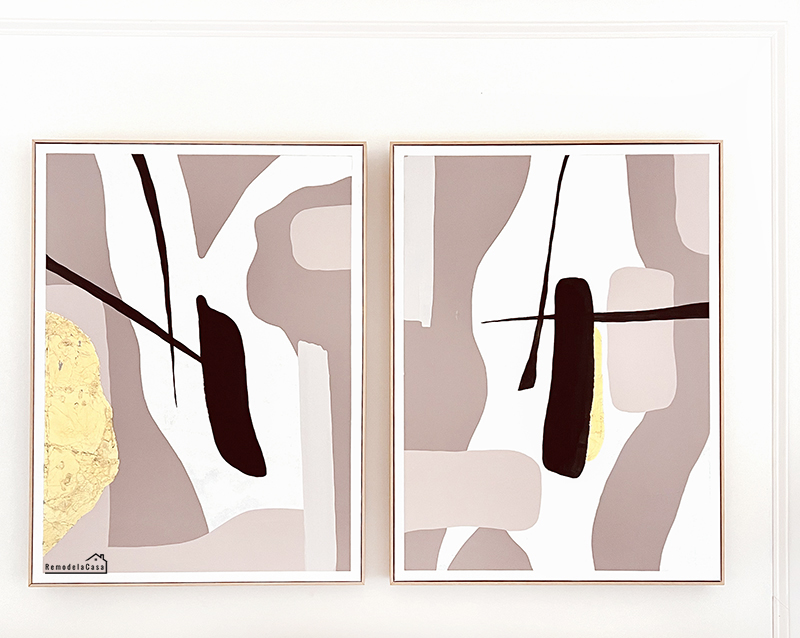
Well, I'm so glad you're here because I'm sharing all the little snippets on how I got this beautiful set of abstracts by repainting those canvases.
Spring's almost here. I'm feeling it, and not in a good way. The seasonal allergies hit me hard last week, and by the time the medicine kicked in, the week was almost gone.
While dealing with those sniffles, I put on my artist hat to repaint those two canvases to decorate my daughter's living room. Her apartment is almost done or furnished. I wanted to take the reveal pictures last time I was there, but for some reason, every time I've set foot, it's a rainy or gloomy day. When I'm done installing curtains, art, etc., it's about 4:00pm, and it's too late for pictures. :/
Let's look at how I ended up with the pretty canvases above!
I had the minimalistic face-line drawing canvas on the picture below. I needed another canvas to fill the empty wall space behind the sofa. Luckily I found the other canvas with the same wooden frame at a significant discount.
Both canvases were very ok, but they didn't work together. It was time to make them into an art set. ;)
*This post contains affiliate links for your convenience. Click here to read my full disclosure policy.
Oh, and you can also check a small video at the end.
1. PROTECT THE FRAMES
Use painter's tape to protect the frames from getting painted. I first placed sections of tape inside the crevice and then pressed them gently toward the outside edge of the frame.
I also added another line of tape around the front of the canvases. I didn't want to deal with paint all along that gap.
2. GET RID OF THE PREVIOUS IMAGES
Gesso is the primer to use on canvases; it prevents the paint from bleeding or seeping. I highly recommend that you use gesso when updating your art pieces.
However, I was again going on a "use what you have" type of approach for this project. Furnishing an entire apartment can leave you with empty pockets in no time.
Kilz was the primer I used, as is the primer I almost always use to prime the walls in my house.
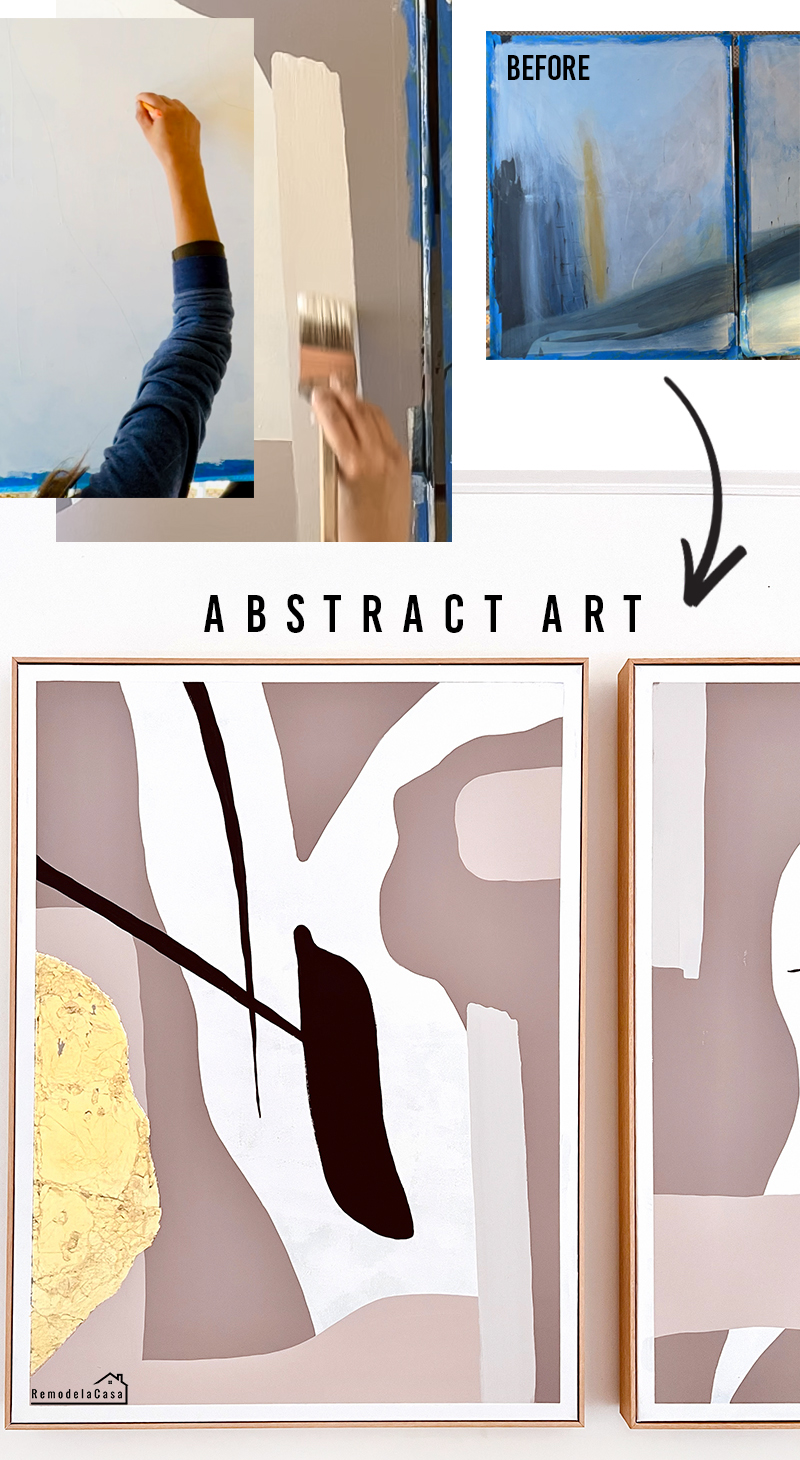
My canvases took two coats of Kilz and one thick coat of white wall paint. The picture below shows it without the final coat of paint.
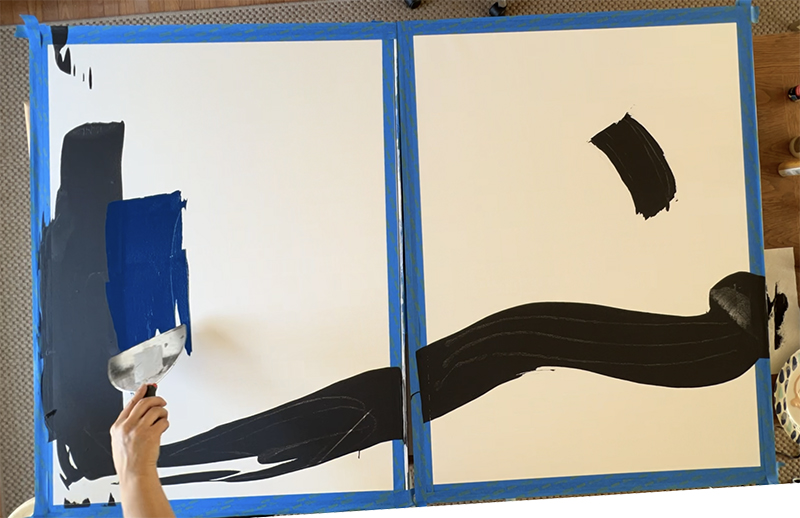
I had watched some scrape painting art videos and thought they were easy and fun to try here. So, black paint was squirted on both canvases to create a continuous line. Then, using my putty knife, the color was scraped, and whoa! That was indeed fun. Well, minus the paint spill after reaching the end on both canvases.
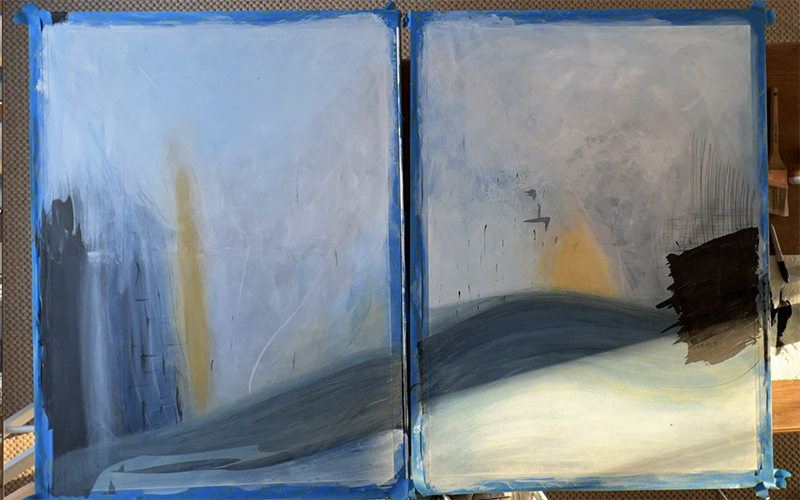
I continued with the blue paint, and soon after, I grabbed the yellow...
After using that yellow, I thought, Oh, this is not going right.
Somehow after trying to fix error after error, I ended up with the awful situation you see in the picture below. 🤦🏻♀️
Embarrassing. :D
At that moment, I thought about all the artists out there and took my hat off to all of them. ❤️
I had to go back to square one and give the canvases another coat of white.
I am not an artist, and I'm not trying to be one. My painting projects are usually blank walls that need one or two coats and small furnishing pieces updated with paint.
Anyways, I needed a set of canvases, and that's when I realized that my biggest mistake was not having a plan in mind.
I steered away from using the scraping tool and mixing colors on the canvases. All the products I was using weren't ideal for that purpose. Instead, I decided to stick to minimalistic blocks of paint. Or, as I say, painting within the lines. ;)
3. FIND INSPIRATION
I set out to find my inspiration on Pinterest. I love it there. It was easy now that I knew what I wanted to achieve.
Below you see what inspired me.
The first set on the left is a DIY project by @Easyinterieur, which was almost exactly what I wanted to replicate.
The other canvases on the right are store-bought pieces from which I also drew inspo.
The new plan set me toward a new, muted color palette. The colors I was previously using were too contrasting.
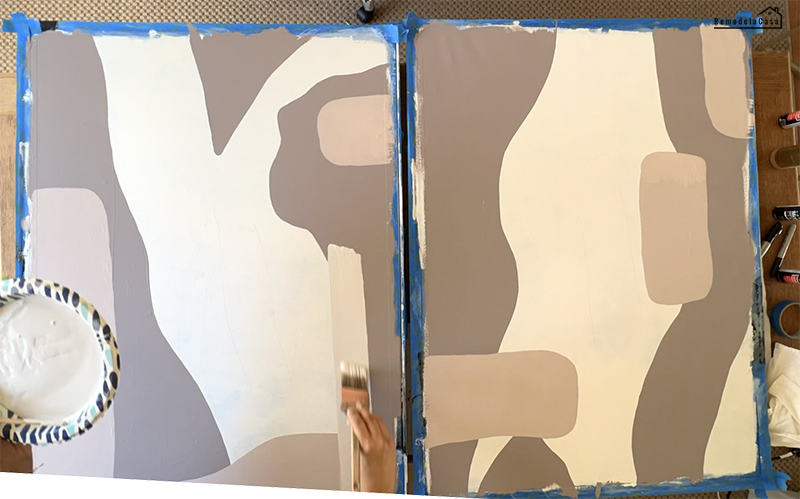
I used only three main colors this time: White, black, and brown.
The brown was mixed with lots of white to create three different shades. Adding more white to get lighter tones. I used a paper plate to mix each tone.
5. CREATE A PENCIL COMPOSITION OR DRAFT
Light pencil lines demarked the areas to be painted. I could even erase those lines if I disliked how the design looked.
7. ADD DETAIL / TEXTURE
Well, just keep within the lines. ;)
I started using the darkest shade and went on until the lightest.
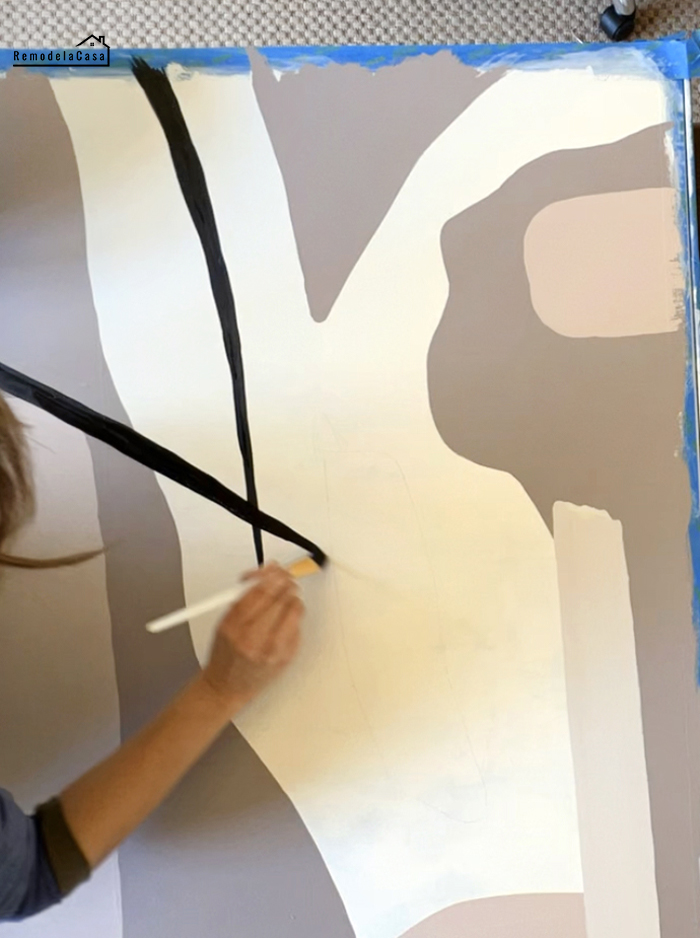
Then, the black accents were drawn in with a smaller brush.
I also added gold leaf accents to my designs by first applying Mod Podge to the desired area and then laying the gold leaf a top of it. It was a small amount of shine and texture to up the glam game.
I love the end result!
I already brought the canvases to my daughter's place; she loves them too. She is enamored with the gold accents.
PIN IT!
Stay tuned for a tour of my daughter's apartment. This set of prints gave her living room a beautiful new dynamic.
Take a look at a little video of this project!







I love them, great job and super tutorial.
ReplyDeleteThanks Marty!
DeleteAmazing. Love your persistance and the video!
ReplyDeleteHaha Thanks! I wish the whole process had gone as fast as it looks in the video. I remember waiting an entire day and looking at those ugly pictures with despair, but I couldn't give up.
Delete