Giving a brand new look to this old dresser was a job that I kept on postponing until I couldn't delay it any longer. The good news is that it's done and I love the outcome.
It was exactly three years ago when I found this dresser at our local flea market. Its price: $30.
A great price for a piece of furniture that looked pretty good, isn't it?
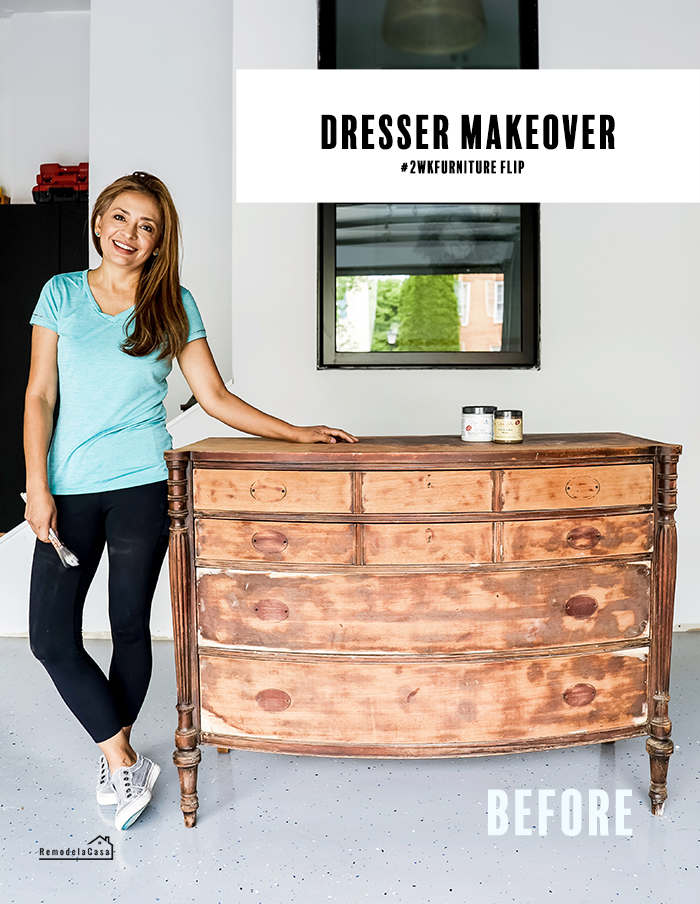
The picture below is how the dresser looked when I finally dug it up from underneath all the crap I had in the garage. As I usually say it was the elephant in the room because, during the entire garage renovation, it stayed there. I didn't know what to do with it.
When I was about to finish the garage floor, I sent it to the basement where it stayed gathering dust until a couple of weeks ago.
*This post contains affiliate links for your convenience. Click here to read my full disclosure policy.
Well, don't you love when someone gives you that little push to go and tackle something you've been putting off?
Yep. That someone was my friend Nicole from Designing Vintage Living - Along with four more blogging friends. We came together to update an old piece of furniture in two weeks (#2wkfurnitureflip). At the end of this post, I'll give you the links to visit my friend's furniture flips.
This is a long post full of pictures. Please get yourself comfortable, grab a cup of coffee and let me show you how you can transform an old dresser into a masterpiece.
My research made me realize that this might be a Sheraton four-drawer, bow front chest of drawers with a cookie corner top. There is a plaque inside the top drawer that says: "The Morganton Collection"- probably from the 1940-50s
Upon closer inspection, this dresser didn't look too good. The veneer was peeling off on many areas of the drawers. The top had plenty of scratches and stains and there were a few areas where the little moldings were missing. As with most old furniture, this one also had that musty odor that's so usual with these pieces. The drawers kept going too far inside the cabinet. However, the biggest trouble was the big gap between the side-front of the drawers and the main cabinet, it felt loose.
1. FIX ANY STRUCTURAL ISSUES THE PIECE OF FURNITURE MIGHT HAVE
The very first task is to fix structural problems because no matter how you finish your piece, it's not going to look good if there's damage to its form. Make sure it's not wobbly and the drawers can close nicely!
There was a big gap between the shelves in between the drawers and the cabinet. The way I fixed this issue was by driving a couple of screws underneath each shelf to secure those shelves strongly to the sides of the dresser.
The tool that worked perfectly for this task was the Kreg Jig R3, its small size was perfect to mount it on each shelf, drill the holes, and then drive a couple of 1 1/4" screws onto the side of each shelf.
 |
| | Kreg Jig R3 | Screws | Clamp | |
Then, it was time to fix the drawer situation. Look how far inside the cabinet, those drawers were getting!
The problem was that some of the stoppers were loose, but many were missing. I used one of the loose stoppers as a guide to cut a few more. They were small pieces of 1/2" square dowels. Remember that the length of those stoppers is determined by how much you want the drawers inside the cabinet.
Before gluing those stoppers in place, I drew a little hole with a drill/bit & marked that little hole with a Sharpie on the back of the cabinet - That was going to be the place to drive a couple of nails to keep those stoppers from moving later on.
Fill holes and cracks with wood filler. I used Dixie Belle Mud in brown, but you can also find it in white. It's very easy to use, dries fast, and can also be used to create raised stenciling effects. Here on the dresser I also used it to fix the small sections of missing moldings.
It blocks odors, and stains & stops bleed-thru - I used clear, but it also comes in white. You have to mix it thoroughly and apply it with a synthetic brush. It dries in about an hour depending on the humidity.
 |
| | Makita Cordless Impact Driver | Drill Bit | |
I used wood glue to set those stoppers in place. Then, the following day, I drove a couple of 3/4" brad nails on the marked spots to further secure them.
 |
| | Titebond Wood Glue | Ryobi Brad Nailer | |
2. REPAIRING COSMETIC DAMAGE
 |
| | Dixie Belle Mud in brown | Putty Knife | |
3. SAND & CLEAN ALL SURFACES VERY WELL
I gave the entire cabinet and drawers a good sanding. In some areas, the stain was removed, although it wasn't a necessity because I was going to paint it. It felt very smooth.
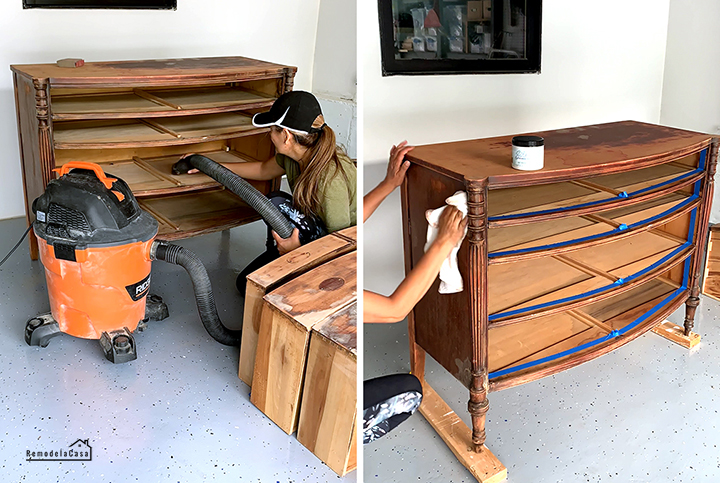
Then, I went all around the dresser with my shop vac to get rid of dust, spider webs, and everything in between.
The final step was to use a tack cloth to eliminate any dust particles that would still be lingering there.
 |
| | Ridgid Wet/Dry Vac | Tack Cloth | |
4. APPLY A BLOCKER
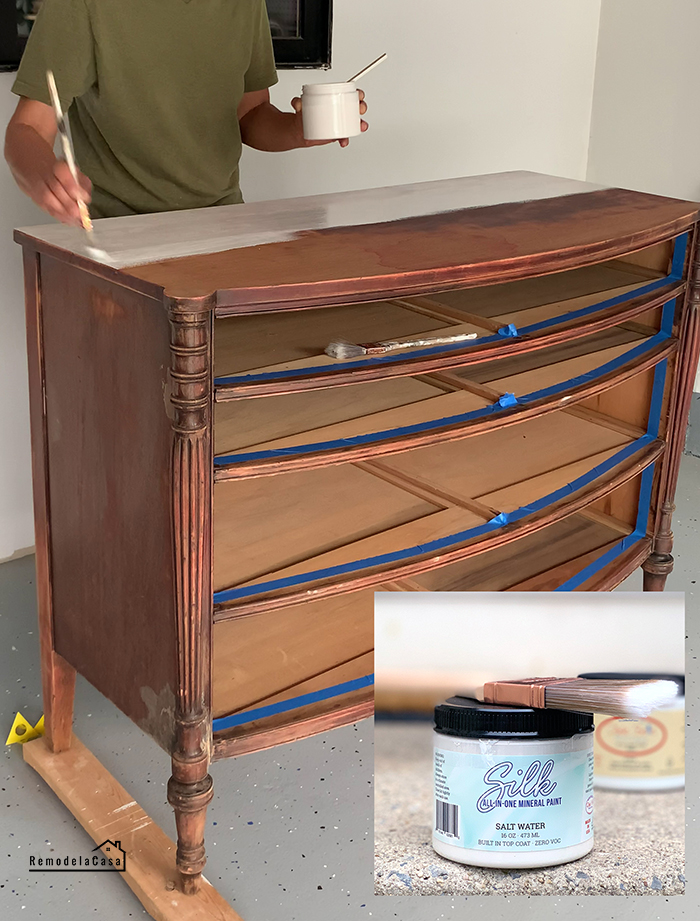
Do as I say not as I do. Here, I went ahead and began painting the dresser/cabinet which was a big mistake without first applying a blocker! 🤦
 |
| | Dixie Belle Silk Paint - Salt Water | |
Look at that!! The bleed-through was intense. It now looked like a pink elephant. :D There were stains all around the piece even though I used Dixie Belle Silk paint (which already has built-in primer). Old furniture (especially mahogany and other species) brings the tannins in the wood throughout any amount of paint layers you apply.
I didn't think the bleed-through was going to be this bad. That's why I went ahead and painted it because I thought the bleeding would be minor, only requiring spot coverages. Ha, it was bleeding all over the place, so now I needed to fix that mess.
The Solution: Dixie Belle B.O.S.S.
I applied four coats of Dixie Belle B.O.S.S. to this cabinet because I already knew this was a tough situation.
5. PAINT
At the end of the day, this is how it looked. 🍃💚🍃
I brought it inside the house for a photo shoot. Although, I had to admit I still need to apply a topcoat. I'm planning on using Dixie Belle's clear coat.
I also lined the sides of the drawers with peel and stick paper that I found at the dollar spot in Target.
Those legs are also beautiful! I used Rub'n Buff - Antique Gold to highlight that little area on those turned legs.
 |
| | Dixie Belle B.O.S.S. | 2 1/2" Synthetic Brush | |
5. PAINT
I learned my lesson! The drawers were first given two coats of Boss. It raised the grain slightly, but nothing 220-grid sandpaper couldn't smooth out.
After cleaning them very well, two coats of Dixie Belle Silk Paint - Salt Water were applied. Guess what? NO Bleed through!
This is how the top of the dresser looks after the four coats of Boss. Then, after two coats of Dixie Belle Silk Paint - Salt Water. So pretty!!
I sanded it slightly between coats, although that's another great advantage of using Dixie Belle Silk paints, they're super smooth, no need to sand at all. My problem was that I had given the dresser so many coats that it was beginning to build up.
But wait, there's MORE!!
Yup. I didn't want to leave this pretty dresser all WHITE.
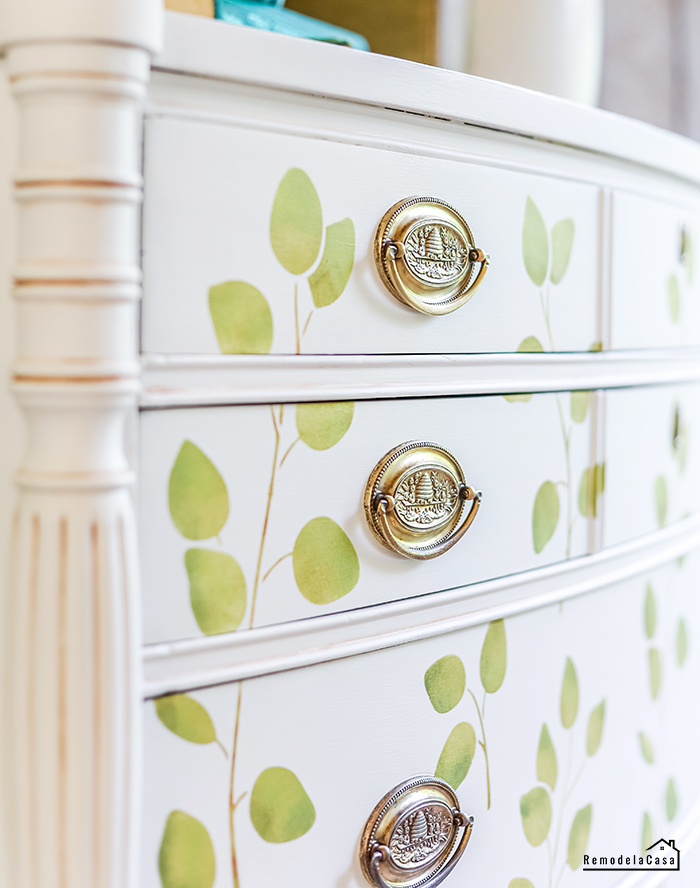
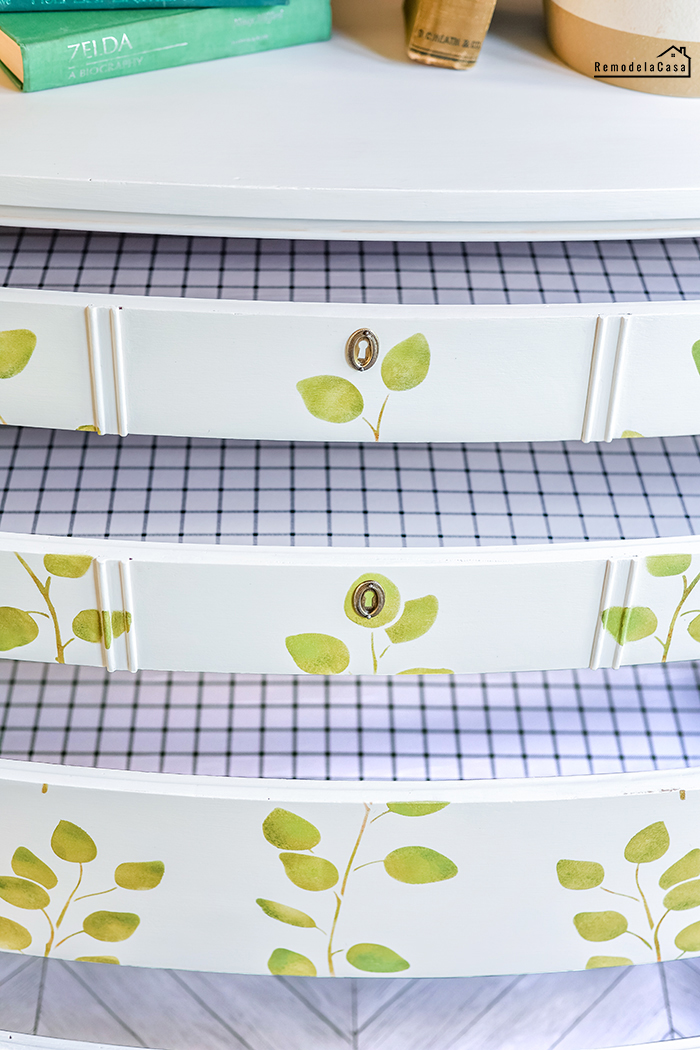
I got this cute eucalyptus stencil and decided it would look lovely on the surface of the drawers.
Let me know if you want more details on how the stenciling was done. I don't want to make this post any longer.
It was my first time stenciling a dresser and it went pretty smoothly.
 |
| | Eucalyptus stencil | Dense Foam Paint Roller | Stencil Brush Set | |
Those cute Heppelwhite pulls are now shining thanks to all the elbow grease my daughter gave them. Well, she used Bar Keepers Friends, an old toothbrush, and a Brillo pad.
Don't you love those cute beehive designs?!
Don't you love those cute beehive designs?!
 |
| | Stoneware Vase | |
Now, what a fun surprise when you see that the drawers are lined! On the top three drawers, I used a paper I had in my stash for a few years already. I set them in place by first applying a coat of Mod Podge on the inside of the drawer, then gently smoothing out the paper.
Sadly I didn't have enough of that type of paper and that's why the last drawer got another type.
A dark glaze was also used to accentuate all the detail and grooves on those legs.
💚💚💚
Well, my friends, I hope you've liked this dresser makeover!
Check the other amazing furniture flips done by the other ladies:
- Nicole @design_it_vintage_living
- Jamala @ Viva La Vintage For Your Home
- Nikki @4thhouse_ontheright
- Holli @pinklincolnchic
- Chantelle @clarke.andco
*This post contains affiliate links.






New comments are not allowed.