Well hello!!
If you visited me during the summer home tour last week, you probably noticed a new ceiling fixture in this room.
Yep.
The drum ceiling fixture you see in the picture below is gone. Instead, a bigger and more beautiful pendant light replaced it. :)
After the built-in unit was completed, the drum light was installed about three years ago. It was a temporary solution because I didn't have the time or money to buy what I wanted. The drum shade was the fixture I used above the kitchen table for many years.
Earlier this year, I removed the drum shade because I thought I could use it in the Parisian room I was decorating. This is how this room looked for the past five months. :D
*This post contains affiliate links for your convenience. Click here to read my full disclosure policy.
I'd been drooling over this light fixture for a long time! I finally gave in and placed the order, but I had to wait about four months for it to arrive. Yep, it was backordered.
The waiting time was well worth it. I love this light!
Well, I love it all except for one single thing, that black cord!🤔
 |
| | Bubbles Brass Ring Pendant Light | |
In my opinion, and given that most ceilings are white, they should sell this light with a white cord—period.
We installed it, and I decided to live with it, thinking the black cord would eventually stop bothering me.
NOPE.
It was impossible to ignore that black cord. I couldn't stand it!
Time to change it.
They sell this same type of cord in a myriad of colors. Again, they should've made it white! :/
This site, Color Cord, sells the same type of electrical cord in many colors by the yard.
However, I didn't want to deal with electrical work, so my easy solution was to paint the cord, and this is how it went:
1. USE PAINTERS TAPE TO PROTECT THE FIXTURE FROM GETTING PAINT
The cord was the only area that needed paint. I used small pieces of painter's tape to protect the fixture areas connected to both ends of the cord.
2. WHAT TYPE OF PAINT?
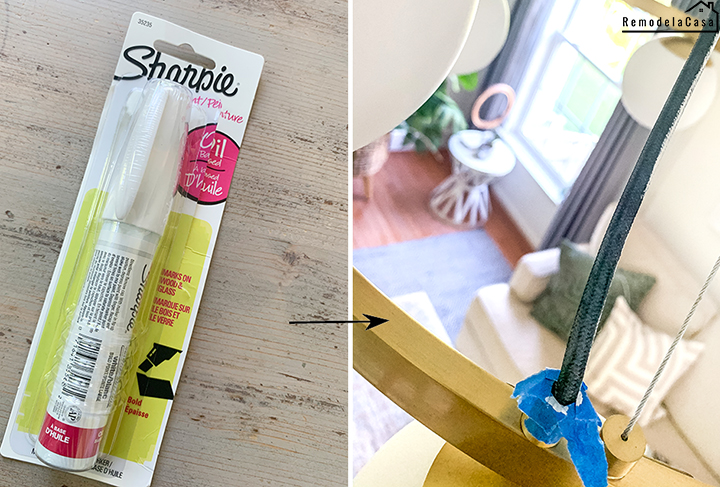
I used what I had at home. I thought that this white paint Sharpie would be the perfect solution for painting this cord because I had used it for many other projects, and I loved the results, but nope, it didn't work here.
This cord is a type of cloth-covered electrical wire with texture. The picture at the lower right shows how the cord looked after I painted it with Sharpie.
Then, I remembered the excellent coverage I had painting this dresser HERE, with Dixie Belle Silk paint, a few weeks ago.
 |
| | Dixie Belle Silk Paint - Salt Water | |
Almost one single coat was all it needed.
Although, I gave it two coats.
And look how nicely it looks with that cord painted white.
It blends in so seemingly, especially when looking from afar!
 |
| | Coffee Table | Rug | Pendant Light | Chair | Pillow Cover 1 - 2 - 3| |
I'm now pretty stoked with this light!! 🤩🤩
The moral of the story, It's all fixable. Make it work for you!
For more DIY & Home Décor, check these out:
*This post contains affiliate links.


This light looks great, Cristina! LOL, I'm so glad I'm not the only one who may have a bare lightbulb or unfinished project lurk about1
ReplyDeletehe he You're definitely not alone!😄
DeleteI love this so much because that's exactly the kind of thing that would drive me insane and exactly what I would do about it :)
ReplyDeleteUgh it was driving me nuts! I'm so glad it was a very simple fix.
DeleteI love it, what a great idea and such a gorgeous light.
ReplyDeleteThanks Marty! I'm very happy with it.😍
DeleteYou’re right! It disappears when it’s white! Why would they ever sell it with a black cord? It’s gorgeous now!
ReplyDeletegreat
ReplyDelete