A thrifty Duncan Phyfe chair gets a dose of TLC to bring it back to its former glory.
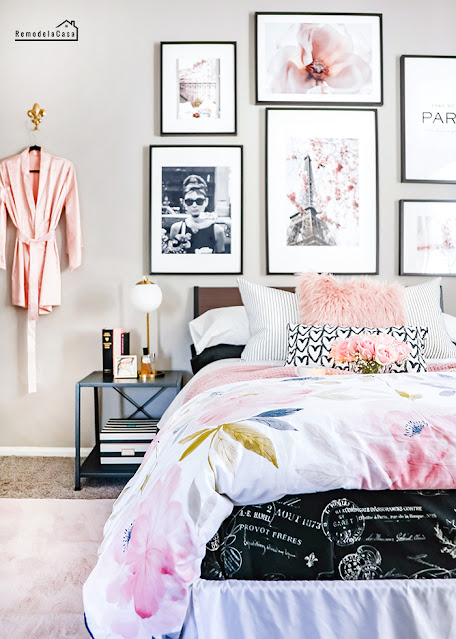
Hello, my friends! Back in December, when I was working on the Paris room makeover for my daughter's friend, the last element to tie the entire project together was getting a nice chair to replace the folding chair she was using. Nothing wrong with a metal folding chair, but I knew we could come up with something better.
I searched many stores like HomeGoods, Target, T.J. Max, etc., and they all have office chairs that range from $60 to $100. Those were very reasonable prices, but the problem was that most of those chairs came with a rolling mechanism. Since this was a carpeted room, the wheels on those chairs were a problem.
I then went in another direction. Enter here: thrift stores!
I spotted this set of Duncan Phyfe chairs in the first store that I visited. The chairs looked OK, but one of them was in such bad condition that I just walked out to find something nicer.
Well, I came back a week later, and the chairs were still there. This time, they had a whopping discount: 75% off, which brought their price down to only five bucks.
Ha, DEAL!
I brought both chairs home and immediately started working on the one that was in better shape.
THE FIRST TASK: REMOVE THE SEAT
Turn the chair upside down, then remove the screws holding the seat in place with a screwdriver or drill.
That tag was still stapled to the chair. Made by Bernhardt Furniture Co. from Lenoir, North Carolina.
 |
| | Milwaukee Drill | |
*This post contains affiliate links for your convenience. Click here to read my full disclosure policy.
This chair was in good shape, with no swinging or loose parts. The next task, if the chair is in that condition, is to disassemble the loose parts, sand, clean, and glue them back together.
2. SANDING
Before going any further, you need to know what type of finish you want to apply to the chair.
Do you want to paint the chair or do you want to stain it?
The amount of sanding will vary depending on the type of finish you choose.
If you want to paint the chair's frame, a light sanding to remove the glossy finish is more than enough. After you clean/remove dust, you can apply a primer and then the paint.
If you go the stain route, you have to go down to the bare wood. More sanding is necessary to get to that stage.
Since I wanted to apply a new stain, I had to do lots of sanding.
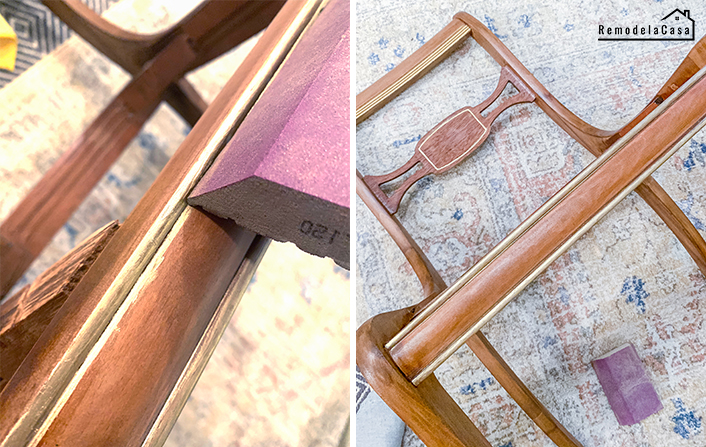
I began using a 120-grit sanding block, but it was taking way too long, so I reached for my orbital sander with the same grid paper.
 |
| | DeWalt Sander | Sanding block | Ear Muff | |
I used the sanding block on hard-to-reach spaces.
I also used simple sandpaper to sand in between those little crevices/details the chair has.
3. APPLY THE NEW STAIN
I went with this Varathane Dark Walnut, which I've been using lately. I like it a lot.
First, I gently stirred the stain to mix it well, grabbed an old sock, and began loading it with stain.
 |
| | Varathane Dark Walnut Wood Stain | |
The next step was to dab the stain all around the chair with the sock.
Here, I was giving it the first coat.
Once the first coat dried, I lightly sanded the chair with 220-grit sandpaper, dusted it, and applied a second and then a third coat of stain, following the same steps.
4. WAX IT
I didn't get any pictures of this step, after lightly sanding the chair one more time and dusting it. I applied a coat of clear wax. Then buffed it.
5. RE-UPHOLSTER THE SEAT
I used the same foam, wood, and padding that came with the chair. But I also added another layer of padding to make it extra cushiony.
I first added all those layers of padding, setting them in place with my pneumatic stapler.
Then, the fabric was stapled in place, tucking in those corners.
When I brought the chairs back inside the house to install the seat, I couldn't help but notice those little grooves/details the chair had. That's when I thought of a way of highlighting those areas.
6. ADD FLAIR BY GILDING THOSE PRETTY DETAILS
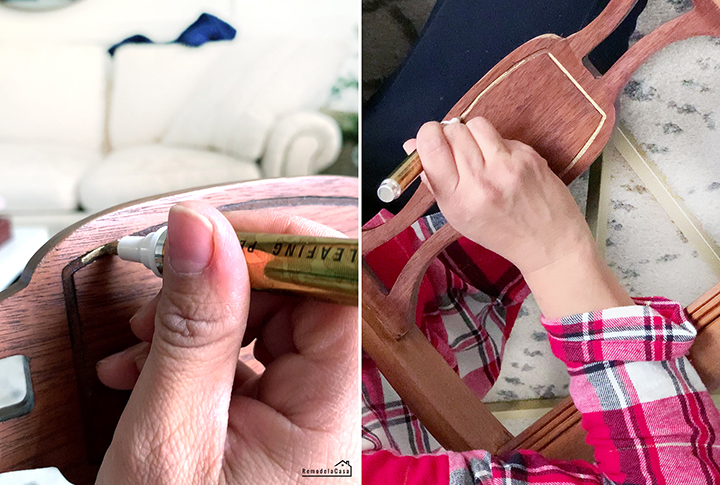
I searched my craft area for gold markers and paints. This gold-leafing pen was the perfect option for this task.
I tried to have a steady hand, but I painted the outside of those crevices many times.
 |
| | Gold Leafing Pen | |
Here on the front of the seat, the gold paint was way out of that line. However, no worries at all. As soon as the paint was dry, I sanded those areas and applied more wax.
GOOD!
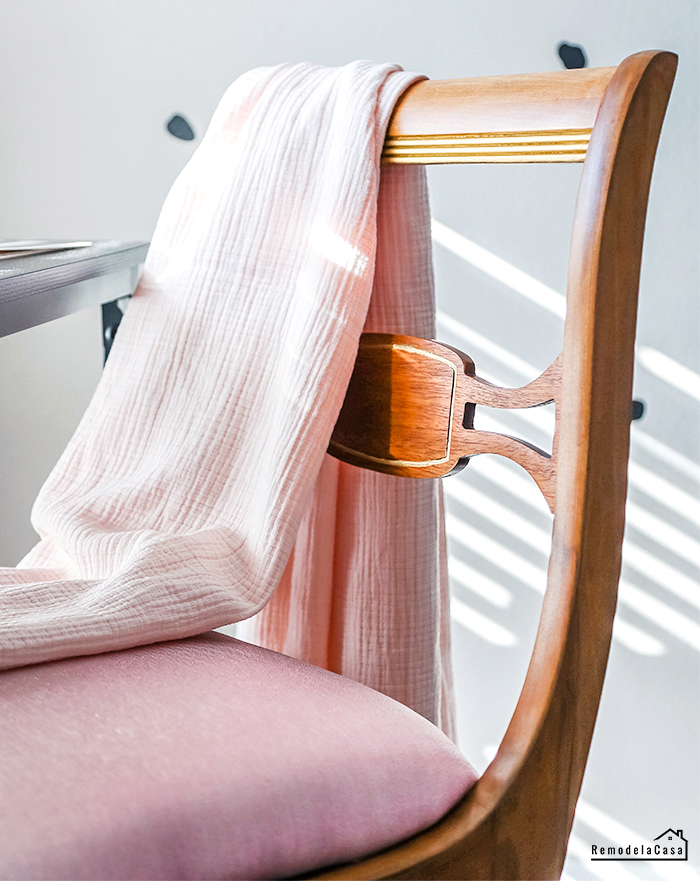
Here you can see it in the Parisian bedroom.
I love those soft curves this chair possesses, and now with the gold accents, she looks so glam!
:)
 |
| | Blush Pink Blackout Curtain | Irregular dots wall decal | Pink Throw Blanket | Desk | |
I hope you have enjoyed this chair makeover.
There were a few other projects completed in this room. Check them out:
*This post contains affiliate links.


Beautiful! My favorite DIY projects are when I can take a dated, abused old piece of furniture and transform it into something lovely and useful again...you totally rocked this! I have done so little lately...puts me in the mood to "create" again!
ReplyDeleteBeck, many times when I'm working on a piece like this, I think what you would do in that type of situation! You have taught me so much with the vast array of projects you've tackled. You're an inspiration! And no, you haven't done little, it's just different. Look at your new house, it's completely transformed!
DeleteGreat job -- so glad you didn't paint the chair - I think that is way overdone. Many times the natural wood is so much more elegant -- just like this chair.
ReplyDeleteThanks Jayne! Indeed, painted furniture has been very popular lately and I do love it, specially when the wood is way too damaged to restore. This chair wasn't the case and she took the stain really well.
DeleteBeautiful job and so glad you opted to stain! Love the gold detailing - perfect finishing touch, Cristina! I spent my weekend stripping veneer that wasn't salvageable off a small waterfall sideboard. Your project looked a lot more fun!
ReplyDeleteI think those gold accents set her apart, hopefully in a good way. :D
DeleteHa stripping veneer isn't a fun job. I've heard you can use a heat gun to soften the glue. Looking forward to seeing how you bring new life into that sideboard.
The devil is in the details! Love how you accented with the gold pen:)
ReplyDeleteWhat a great transformation. I'm just getting ready to try my hand a recovering a similar chair. This is super helpful.
ReplyDelete