Building a banquette was the solution to bring in lots of seating space to my sister's dining room without overcrowding it with chairs!
If you're new here, let me give you a little update on this project. My sister's dining room (picture below) was getting a makeover. After emptying it and getting rid of the texture on the walls and ceiling, the first big project was to add a banquette bench all along that right wall.
You can read about the plans we had for this dining room in my previous post right HERE.
This is a project that my nephew Julian completed all by himself. You can see the plans for this banquette bench right HERE.
I'm going to give you a general description of what he did. The plans by themselves are a better guide for you to build a similar banquette.
THE MATERIALS:
The main materials were:
- 2 x 4's
- 3/4" plywood &
- a few 1 x 2 pine lengths.
- Wood shims
- Construction screws
- Paint or stain supplies
THE TOOLS:
- Measuring tape
- Drill
- Table saw
- Level
- Clamps
- Square
- Jig Saw
- Nailer
- Sander
DIRECTIONS:
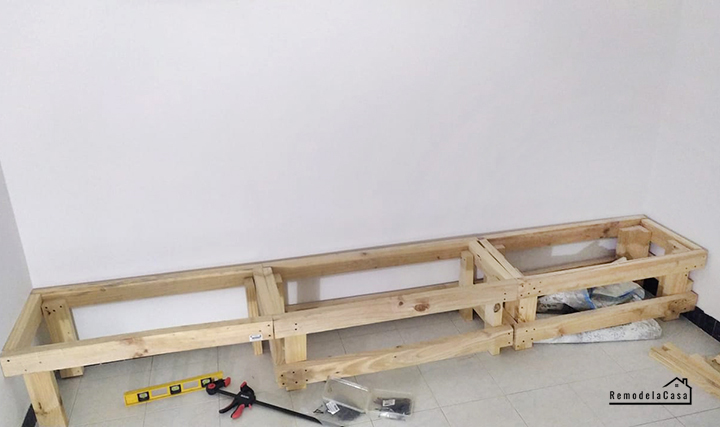
The entire build was divided into three parts. Using 2 x 4's, three bases were built.
This is perhaps a great way to build off-site and bring those smaller pieces to the job site.
For each base, he first built a lower rectangular frame. Then, he attached the vertical supports and then the top frame.
Make sure the entire structure is level. Then, secure each base to each other and to the wall and floor.
Three 2 x 4 seat supports were added to the inside of each base.
Then a 1 x 2 pine strip was added to the front top of the bench.
The next step was to cut the plywood for the inside/bottom of each bench, notching out the corners.
Then, the top seat was also cut for each of the three benches, cutting out the center to get to the storage area.
Each of those supports was attached to the seat and to the wall.
That front 1 x 2 strip was set high enough to keep the cushion in place.
The back of the banquette was then covered with planks. First the back and then, the sides paying attention to the angle cuts.
The front part of the bench was also covered with planks.
The final part was to fill all those nail holes and gaps and then sand everything smooth before priming and painting.
The storage compartments can be accessed by removing the top of each bench thanks to that hole in it.
1 x 2 pine strips were also installed to close that gap on the back of the banquette.
Here's a little peek, with the cushion in place:
Stay tuned for more of this dining room makeover! Up next, is the table.
Check all the work done in this dining room:
*This post contains affiliate links.


Great solution to creating enough seating without taking up the entire floor space. Looking forward to the finished project.
ReplyDeleteRight?! Ugh fetching those pictures and editing them is taking me forever! :/
Delete