This post is sponsored by The Home Depot.
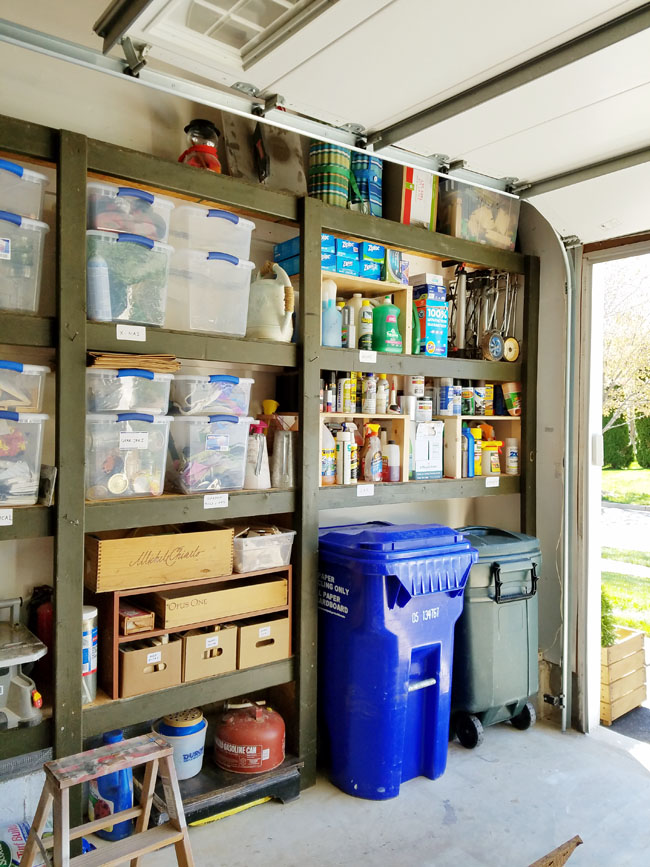
I don't know at what moment my garage turned into the huge mess you see below!It was about two years ago when I brought organization to this space with an extra pegboard and other small builds. However, after a couple of years and countless projects, I shouldn't be surprised with the state of the workshop today. :(
This Fall my main goal is to once again bring organization to my garage. Not only that, but I also want to create workstations to make the building process more comfortable and safe. The three main building projects I have in mind are:
-Miter saw station
-Table saw stand
-Storage cabinets
Today's project: A storage cabinet that doubles as a charging station.
*This post contains affiliate links for your convenience. Click here to read my full disclosure policy.
That's why the charging station and tool storage cabinet was the first one I wanted to get off my to-do list.
This is an easy build. The depth of the main cabinet is only 12" which I think is awesome because your tools won't get lost in its depth and you don't need a huge amount of material to build it! Let me show you how it all went for me.
How to Build a Charging Station + Tool Storage Cabinet
 |
| Get the plans HERE! |
Materials
Plywood - four sheets.
1-1/4" pocket hole screws
1-1/4" wooden screws
8 Hinges
Sandpaper 120-grid
6 Husky 10-Compartment small parts organizers
2 16-inch pull-handles
Tools Used
DeWalt Miter Saw | Milwaukee Drill/impact combo | Kreg Jig | Dewalt Circular Saw | Sander | Tape Measure | Brad Nailer | Framing Square | Screwdriver | Clamps | Jig It |
Charging Station + Tool Storage Cabinet
Cut List
2- 86-1/2" x 12 - sides
2- 85" x 18 - doors
1- 87-1/2" x 36 - back
7- 34-1/2" x 12 - shelves, bottom
1- 36" x 12" - top
1- 28" x 12" - lower divider
2- 14-1/2" x 11-1/2" - lower shelves
22- 4" x 12" Husky organizers holders
2- 5-1/2" x 12" battery compartment dividers
8- 12" x 12" drill compartment dividers
1- 34-1/2" x 2-1/2" - kick plate
To make this build even easier, I headed to the Home Depot to get the plywood and asked for them to cut it. Two sheets were cut at 12" intervals, and the other two sheets at 36" (all lengthwise).
Here you can see the load inside my minivan.
At home, using the miter saw, I followed the cutting list above to get all the necessary pieces for the main cabinet.
Drill pocket holes on:
- Both ends of all shelves (including top and bottom boards)
- One long side of 10 organizer holders
- both sides -top and bottom drill station dividers
Mark the location where shelves/dividers go.
I always like to draw the lines where the shelves will go. I think it's the best way for me to keep everything perfectly aligned. You can also use wooden guides instead.
Cabinet Assembly
The only hard part about the cabinet assembly is dealing with its size because it's a large cabinet.
The first step was to put together the big box. Sides, top and bottom.
I didn't attach the back of the cabinet at this point to have clear access when assembling the top dividers.
The small vertical supports were nailed in at the very end of the entire build. - The lower support gets in the way of the lower hinge and it needs to be trimmed.
I installed the next shelf followed by the vertical division on this lower part of the cabinet and then, finished installing the other set of boards for the Husky organizers.
Battery Storage Compartments
For the next section, the battery storage compartments, I first installed both dividers in the center of the shelf. (Right picture below)
Regular 1-1/4" screws were driven from the top and lower shelves and into the dividers.
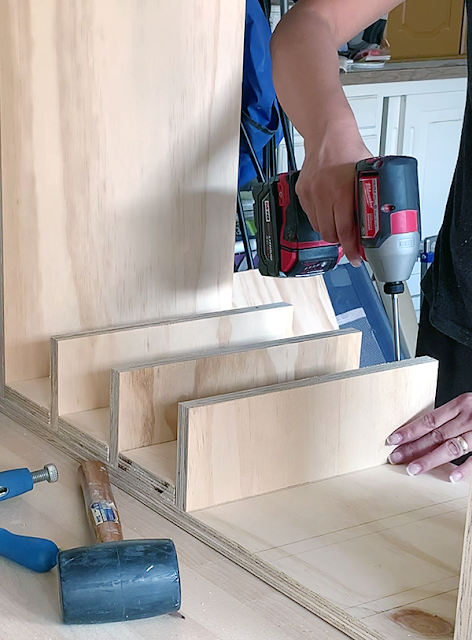
Continue installing the remaining shelves. Then, install the drill storage dividers using 1-1/4" pocket screws.
Install the back
Bring the cabinet face down on the ground, make a little mark on each side of the cabinet to where the shelves are located. Bring the big piece of plywood, good side down, align it on the back of the cabinet, and drive 1-1/4" wood screws all around the cabinet.
Use those markings to draw the lines where the shelves are located and drive a couple of screws on those lines too.
Install the kick plate
With the cabinet still facing down, place a few 3/4" scrap pieces on the floor, bring the kick plate on top of them, and set it in place. I even added extra support in the middle of the cabinet.
Mark the location of the outlet and using a jigsaw make the cutout.
It's now time to bring the entire cabinet to its designated space. Watch out, it's HEAVY!
Given that this is a tall skinny cabinet you have to attach it to the wall.
Find the studs on the wall and drive at least a couple of screws onto the studs to set this cabinet in place.
Install the shelves for the circular saws or other tools you might want in that lower spot.
I love how it looked at this point, but the blanket of dust that all my tools collect over time was the major motivation to add doors to this cabinet.
The Doors
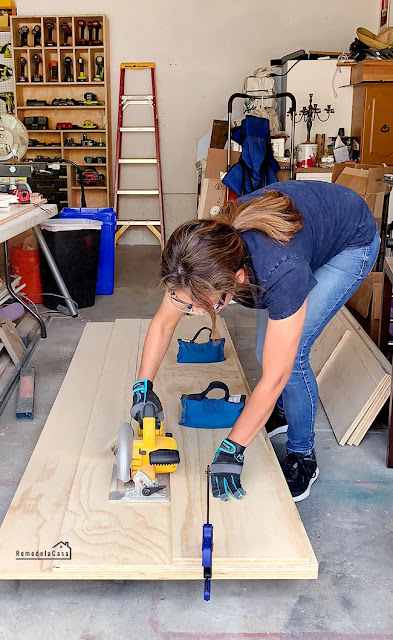
I used my DeWalt circular saw and a straight edge to cut the same 3/4" material for the doors.
Then, I used the JigIt to drill the cups for the hinges, four on each door. |
| | Jig It | 35 mm 110-degree Full Overlay Cabinet Hinge | Firm Grip Gloves | |
Installing the doors was again not that easy, due to their large size. But, I managed to do it all on my own. And this is how the cabinet looked at the end of the day - A bit too boring for my liking.
Paint and Finish the Cabinet Doors - Optional
I used some remnant chalk paint I had, gave it three coats sanding in between coats. Oh, and I taped that little design on the bottom right side door to break all that black. ;)
The final touch was to add those extra-long pull handles.
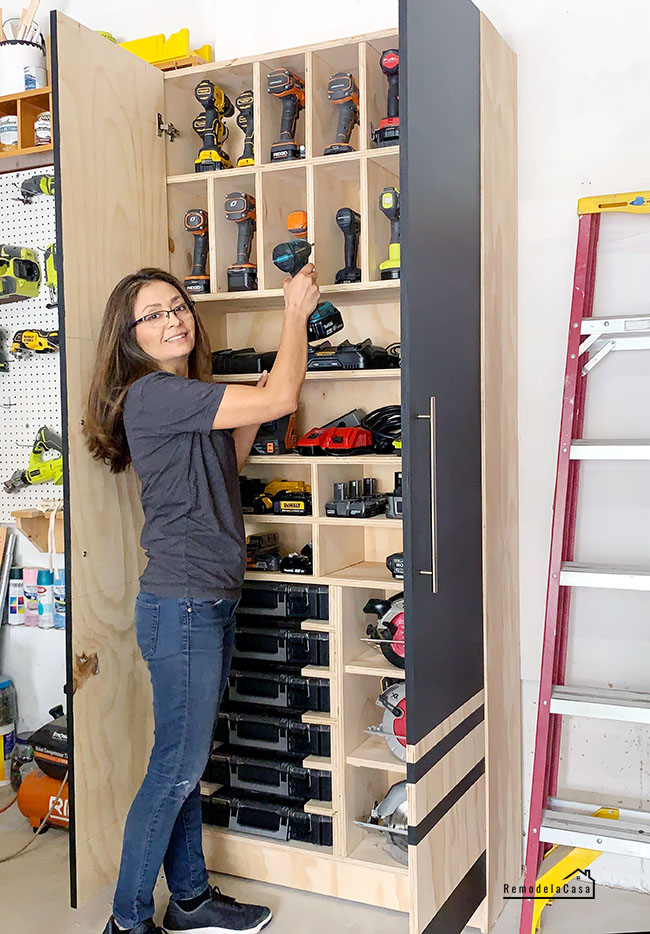
No more running inside the house to get a drill or a battery. It's all here and ready to go!
I need to buy myself a set of multi-outlet power strips to connect all the chargers.
The drill station at the top keeps all those babies secure. A nice spot to also store the nailers.
You can stack them on their own, but I like that I can grab any one of them at any given moment without having to move the ones on top.
Well, I'm delighted with this neat spot I now have and I can't wait to start on my next building project to bring some more organization to my garage.
UPDATE: After moving things around and organizing that corner, this is how it looks:
 |
| | Best Tool Storage Workbench | Miter Saw Station | Pegboard | |
For more garage organization ideas check these out:
I acknowledge that The Home Depot is partnering with me to participate in the promotional program described above (the “Program”). As a part of the Program, I am receiving compensation in the form of products and services, for the purpose of promoting The Home Depot. All expressed opinions and experiences are my own words. My post complies with the Word Of Mouth Marketing Association (WOMMA) Ethics Code and applicable Federal Trade Commission guidelines.
*This post contains affiliate links.


This is awesome and I need one.
ReplyDeleteOh, it makes things SO much easier!! Yes, you gotta build yours! 🙌
DeleteGreat Job!!
ReplyDeleteThanks!
DeleteWOW! l am moving to an old house with a big garage in about 6 weeks, and l am SO looking forward to having a place for all my tools, as well as a place to use them! This cabinet is the stuff of dreams, at least for someone like me! What an inspiration this is!
ReplyDeleteHi, hugs from Brazil, nice project, I love it. Congratulations!
ReplyDelete