Have you heard those stories about people finding gorgeous pieces of furniture on the side of the road?
Yeah, I know. You just wonder where those magical roads might be located!
Then, you think... Why it never happens to me. :/
Well, this piece of furniture can be one of those stories. And I wasn't the lucky one.
It was my sister-in-law the one that spotted the gorgeous buffet sitting there...
Nope, it wasn't on the side of the road.
Every time she took this road, she saw the gorgeous buffet sitting there, on the far-end corner of this front porch. It was hard for her to look at this piece on rainy days. She knew it was getting damaged.
After she couldn't take it any longer, she decided to stop by and ask...
Can I have it?
The answer: Yes! And you can also take the hutch that's inside in the foyer. :D
Ha, maybe that's what you and I have to do from now on... Just ask!
Well, I guess that's if we find those roads. 😃
The veneer on both sides of the piece was the part that endured the water damage.
THE PLAN
Pilar wanted to use this piece in her craft room. So, besides repairing the damaged veneer and giving the piece a nice finish with an antique character, she also wanted to add a shelf on the lower part.
The following are the ten steps it took me to transform this piece from dark and drab to bright and glam!
1. VENEER REPAIR
I didn't take a before picture of the damaged veneer, but it was bad. lots of loose little pieces.
They were removed and those sunken spots were leveled up with wood filler.
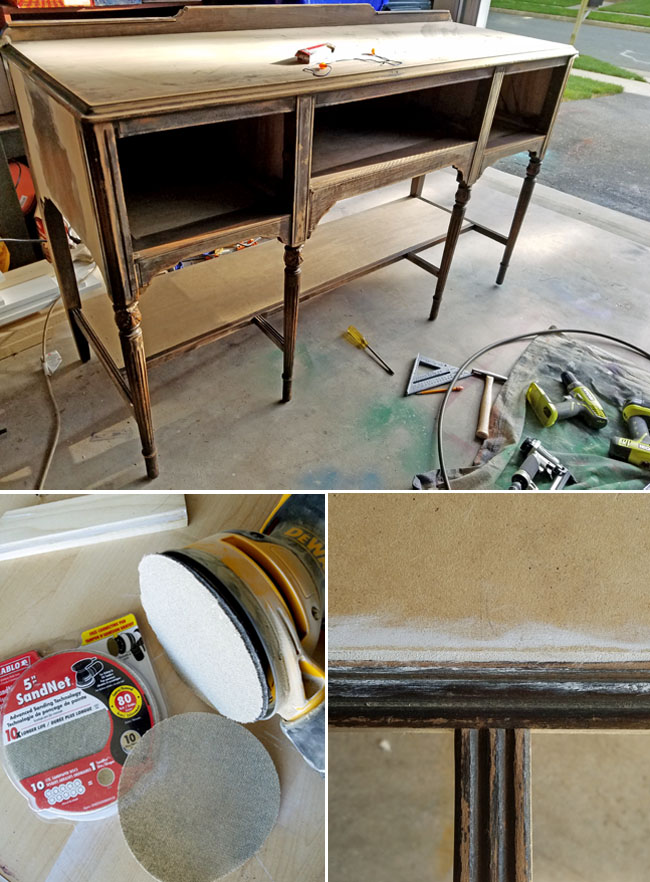
Then, I used a 220-grid sanding disc to smooth out the entire area.
2. BUILD A SHELF
Every time I look at that lower part of this type of buffet I'm curious to know why they didn't add a shelf. It seems like the most logical way the put that lower part to good use. Storage is always welcome.
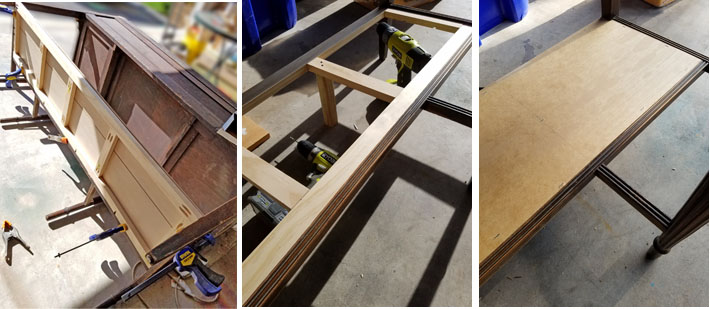
Now, I didn't want to cover the detail on the top of those support pieces. That's why I built the shelf to be placed on the inside back part of those supports.
1 x 2 material connected with pocket holes and glue were the main elements to construct the shelf.
¼" plywood material top it off.
3. INSTALL THE SHELF
Again, pocket holes and glue were the ones used to attach the shelf frame to the buffet supports.
I also attached two legs of 2 x 2 for added support on the back.
The ¼" plywood cover was set in place with staples.
4. FILL GAPS WITH WOOD FILLER AND SAND
Wood filler was used to close gaps and little holes. Then, it was time to sand the entire piece. I started sanding lightly with an 80-grid sanding disc, but then I used a 120-grid.
The legs were sanded with a piece of 120-grid sandpaper.
Before going on the next step it's important to clean really well all the areas, getting them free of dust.
5. PRIME
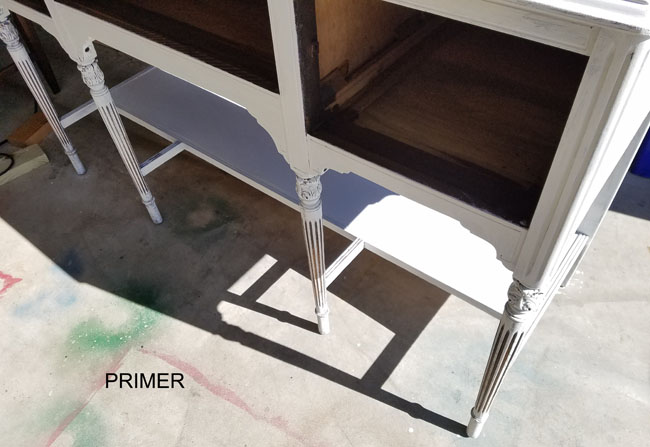
Even if you're using chalk paint like I did, it is a wise practice to prime these dark pieces before painting them. You don't want stains bleeding through your finished coat.
I didn't prime those recessed areas, after all, I wanted them on the darker side. ;)
6. SAND & PAINT
I gave the entire piece two coats of chalked paint. It kind of looked good with only one coat, but certain parts still needed more coverage.
Of course, the chalk paint finish is far from smooth, but that's when I used very fine sandpaper. A 320-grid sanding disc was used to sand all those long flat areas.
Clean all the surfaces very well before going on to the next step.
7. SEAL
A light coat of clear wax was used to protect the finish. Then, using a soft rag it was buffed.
I could've stopped there but it was too white! The paint was hiding all those beautiful details.
The solution for that...
8. GLAZE
I applied a translucent color glaze to highlight those pretty details and engravings.
You apply it and immediately use a wet rag to remove most of it, leaving it only on those parts that you want to highlight.
You can check my kitchen island makeover HERE where I used this same technique to paint it.
Apply a tiny bit of gold on those highlighted areas for added charm.
Once dry, give the entire piece another coat of wax.
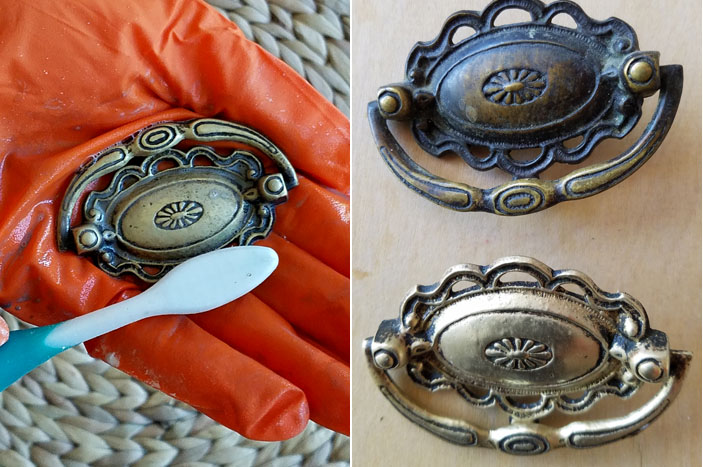
The last step was to clean the hardware with Bar Keepers Friend.
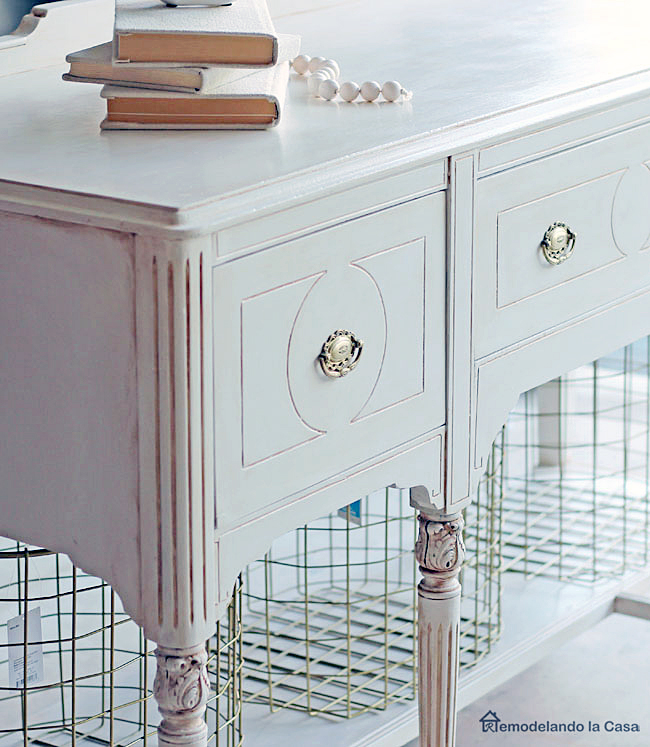
And here is the new beautiful buffet in all its glory!
The three gold wire bins fit so perfectly on the shelf.
My SIL loves the new addition to her craft room! Here is a little peek at how it looks in its new space.
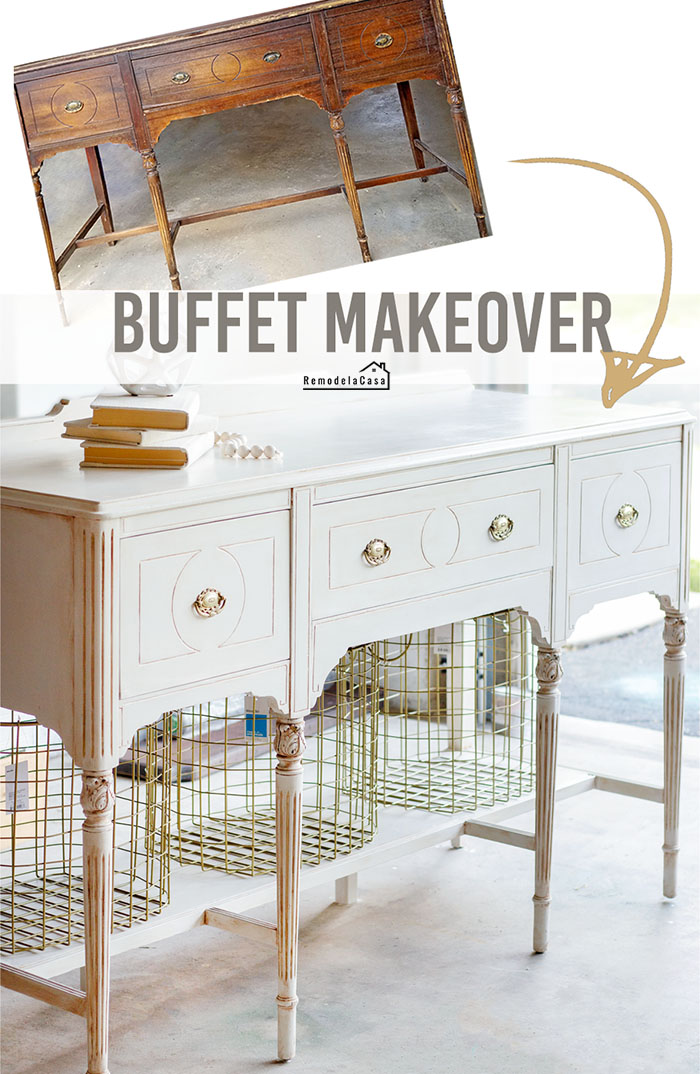
And I couldn't leave you without a before and after of this makeover:
Love it!!
Here's a short video of this makeover:
9. GIVE IT SPARKLE
Apply a tiny bit of gold on those highlighted areas for added charm.
Once dry, give the entire piece another coat of wax.
10. CLEAN THE HARDWARE
The last step was to clean the hardware with Bar Keepers Friend.
And here is the new beautiful buffet in all its glory!
The three gold wire bins fit so perfectly on the shelf.
My SIL loves the new addition to her craft room! Here is a little peek at how it looks in its new space.
And I couldn't leave you without a before and after of this makeover:
Love it!!
Here's a short video of this makeover:
*This post contains affiliate links for your convenience.








That is gorgeous! What a beautiful job. It's nice you have a story to go with it too!
ReplyDeleteThe piece came out great!
ReplyDeleteFantastic Job amiga! You are a lady with many many talents!
ReplyDeleteMerry Christmas!
Cynthia Schuster - Parker, CO.
This is such a beautiful piece! I can't believe this was just sitting on someone's porch out in the weather...I guess I need to pay more attention driving down the road ;)
ReplyDeletexoxo, SS
Southern and Style
This is a lovely piece. The addition of the shelf is a great idea. It always amazes me what people throw out but it is good for us furniture painters.
ReplyDeleteGreat job -- curious what you did with the hutch?
ReplyDelete