Hi friends,
Once again I'm thrilled to be a part of a group of bloggers that get together every October to bring you lots of Christmas ornament ideas to decorate your tree this holiday season!
Yes, today is my day to share my ornament for the 31 Handmade Christmas Ornaments blog hop organized by Yesterday on Tuesday, Cupcakes and Crinoline, and An Extraordinary Day.
At the end of the post, you'll find the links to all the other ornaments that my friends have created.
*This post contains affiliate links for your convenience. Click here to read my full disclosure policy.
As for me, well, you know I love wooden projects. Wood, is again, what I chose to create my ornament. I could've done it with the many scrap pieces I have around, but I decided to go the easy route, getting those little craft boards (poplar 1/4" x 3" x 4') at the Home Depot.
I used two of those boards to create 18 tag ornaments. ;)
 |
| Clamping Miter Box | Back Saw | Drill |
You can use a hand saw to cut the 5" pieces of wood for each tag. I used a miter saw and that sped things up. Cut the top two corners and drill a ¼" hole for threading the ribbon.
Give them a light sanding.
I spray-painted them with Rust-Oleum Chalked paint, and hey, it was a full production line. Yep, both sides got painted one right after the other.
Once dried they got a light sanding.
The decorative possibilities are endless!
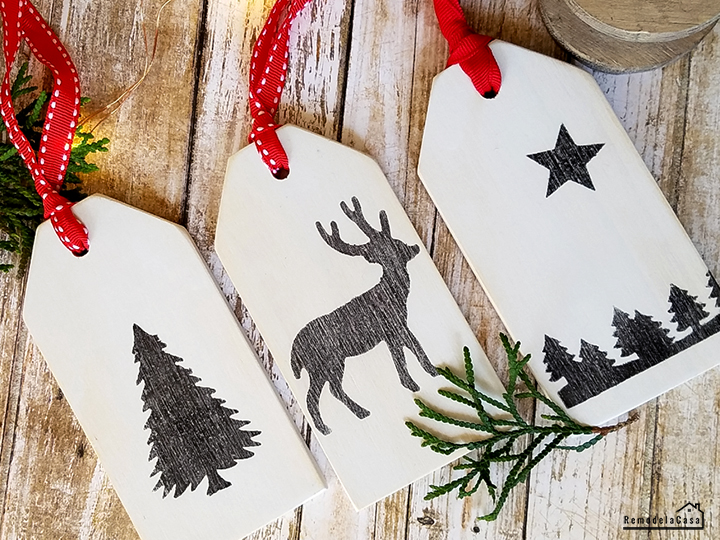
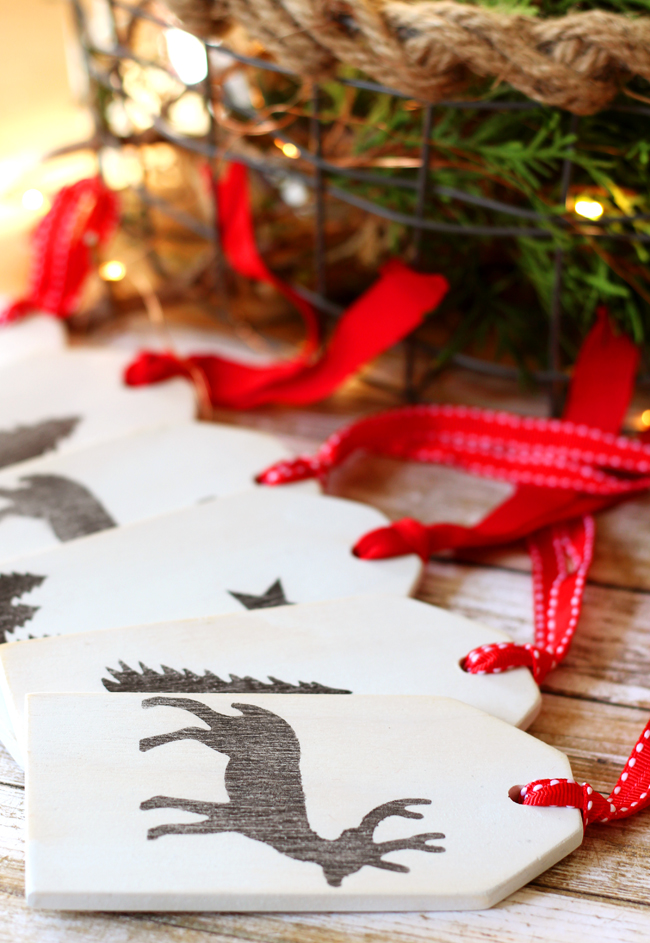
I decided to stencil some Christmas designs with paint on a few of them. Then, the design was protected with clear poly
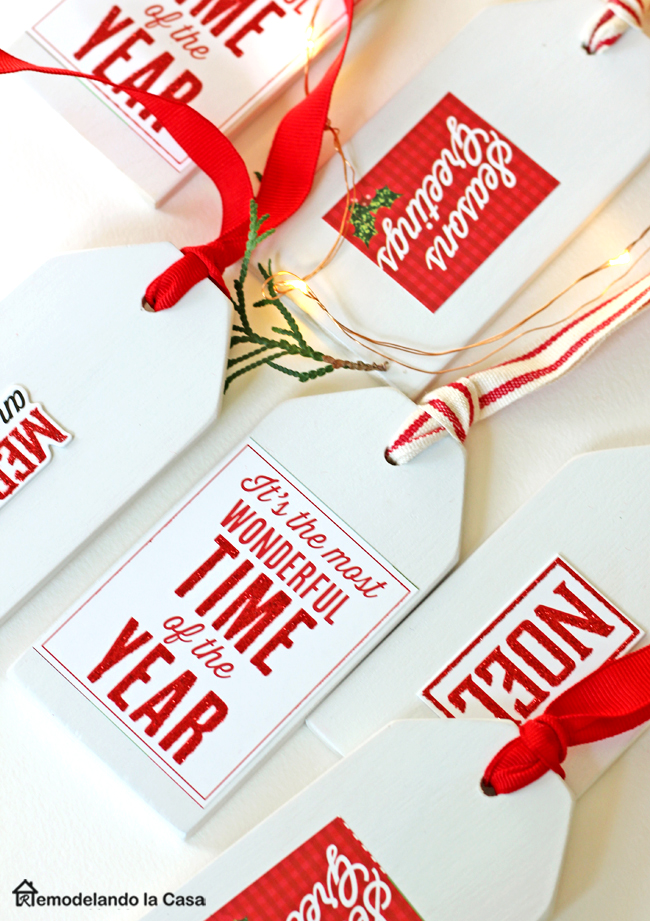
On others, I simply added Christmas stickers that I bought at Michael's.
The last touch was to add ribbons and they are ready to decorate the tree or gifts, they can be used just about anywhere around the house!
I call this, the rustic set... Black and white with a vibrant red ribbon.
This one is the neutral/gold set.
And this is the red and white set.
Well yeah, I made a bunch! :)
Which one is your favorite? Let me know in the comments below. That's your entry to WIN your favorite set. On November 20th, I'll be revealing the winner. ;)
Now, let's check all the awesome handmade Christmas ornaments my friends have created!
Listed below are the 30 other bloggers, each sharing a fabulous handmade Christmas ornament each day throughout October.
Here are all 31 Bloggers in order of their appearance:
Day 1 - Pet Scribbles | Day 2 - Yesterday on Tuesday
Day 3 - Cupcakes and Crinoline | Day 4 - An Extraordinary Day
Day 5 - Celebrating Everyday Life | Day 6 - Hunt and Host
Day 7 - Love of Home | Day 8 - Celebrate Creativity
Day 9 - Petticoat Junktion | Day 10 - What Meegan Makes
Day 11 - Atta Girl Says | Day 12 - Sweet Pea
Day 13 - Exquisitely Unremarkable | Day 14 - Imparting Grace
Day 15 - In My Own Style | Day 16 - 504 Main by Holly Lefevre
Day 17 - Inspiration for Moms | Day 18 - The Chelsea Project
Day 19 - I Should Be Mopping the Floor
Day 20 - My Uncommon Slice of Suburbia | Day 21 - Hearth and Vine
Day 22 - Shabby Art Boutique | Day 23 - Remodelando la Casa
Day 24 - Domestically Speaking | Day 25 - Swoodson Says
Day 26 - Stone Gable | Day 27 - My Creative Days
Day 28 - The Crafting Nook | Day 29 - Knick of Time
Day 30 - Lovely Etc. | Day 31 - Live Laugh Rowe


I love the ornaments that you created! They are going to make great gifts and they'll look good both on your tree and tied to packages.
ReplyDeleteThe black and white set is my favorite!
DeleteThese are adorable. Could be used for gifts and would look great on the tree too!
ReplyDeleteWhat a great idea. I love them all, but I think the rustic ones are my favorite. So pretty...
ReplyDeleteI like the neutral/gold ones!
ReplyDeletecool idea, it would be great to make with girlfriends at a party: doing most of the work ahead of time, with just the stenciling left out!
ReplyDeleteThese are not only beautiful, they will also make great mementos to the recipient! A future Christmas ornament!
ReplyDeleteI LOVE these!!! What a fantastic idea. Going into town tomorrow and will stop at Home Depot to get supplies. I think I'll have my 11 year old granddaughter join me and make these. She will love it too. Thanks so much for sharing your idea.
ReplyDeleteI LOVE them all Cristina... but the rustic set is my first choice... *this year.* ;)
ReplyDeleteThere are so many ways these could be used... my mind is whirling with ideas!
Once again, you created a fabulous ornament.
I'm so happy to have you sharing with us again this year!! xo
Oh I love the simple, rustic charm of your ornaments - SO SO Pretty!!!
ReplyDeleteso many precious ideas, I love this idea!!!
ReplyDeleteI love them all, but my favorites are the ones with stickers. Pinned!
ReplyDeleteThese are so beautiful, love each and everyone!
ReplyDeleteThe rustic set is my favorite. I'm definitely pinning this idea for my daughter and I to make this year; the tags could be used in so many ways.
ReplyDeleteOh how I love this idea! Thanks so much for sharing so many ways to decorate these little wooden jewels. My mind is racing with ways to decorate some as gifts. Can't wait to rev up the Ryobi. LOL.. Susie from The Chelsea Project
ReplyDeleteI love the Rustic set the best, but the gold is nice and so is the red and white. They look so simple to make, looks like another steal!!
ReplyDeleteThe red and white set is my favorite. Thank you for sharing something so creative, so unique!! They are all gorgeous!
ReplyDeleteWhat a creative way to decorate your Christmas tree! I love all the various colors and styles. Each gas a beautiful Christmas touch. Thanks for inspiring me.
ReplyDeleteI absolutely love these! They would make great gift tags we well and part of the gift inside!
ReplyDeleteOh my goodness...I love these and all the possibilities!
ReplyDeleteAll of the ornaments are beautiful ,,,must I pick one ,,I go with the gold ornaments !!!Thanks..
ReplyDeleteThis is such a great idea and I love how you shared the entire tutorial! Sometimes, I can't quite grasp the whole process but you made it so simple. These are pretty, versatile, and awesome! Thanks so much for sharing.
ReplyDeleteSuper clever, love the idea for dual purpose!
ReplyDeleteThese are SO impressive!! I don't think I would've been brave enough to tackle something like this, but you've TOTALLY inspired me!!! Love them!! Great job!!
ReplyDeleteI seriously love all of them!! AAAAhhhhh! How to pick just one?? I guess I'll go with gold. But really I'd take any of them :) Well done!
ReplyDeleteI love, love, love these!! I especially like the rustic ones. What a great idea to make a bunch of these. You better believe I pinned this idea--thank you!!
ReplyDeleteLove these! Wood is always my favorite material to work with and I can think of so many uses for these wood tags even beyond ornaments.
ReplyDeleteThe tags are so fun, what a great idea!
ReplyDeleteI love the rustic set!
ReplyDelete