It is amazing to see how your outdoor space gets transformed with the addition of string lights. It immediately turns into a magic space!
This is the first Summer, after more than 10 years of living in this house, that we're going to enjoy our backyard! Ha it's about time, isn't it?
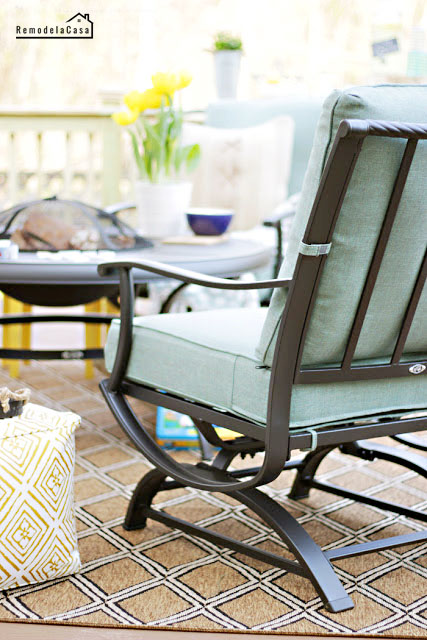
In the morning, this is my gardening space, every time I'm watering the flowers I find any excuse to come here and change things around. And at night, it's the kid's retreat, my son is already a master setting the fire-pit, and believe it or not, he has prepared dinner right here! I'm loving that. ;)
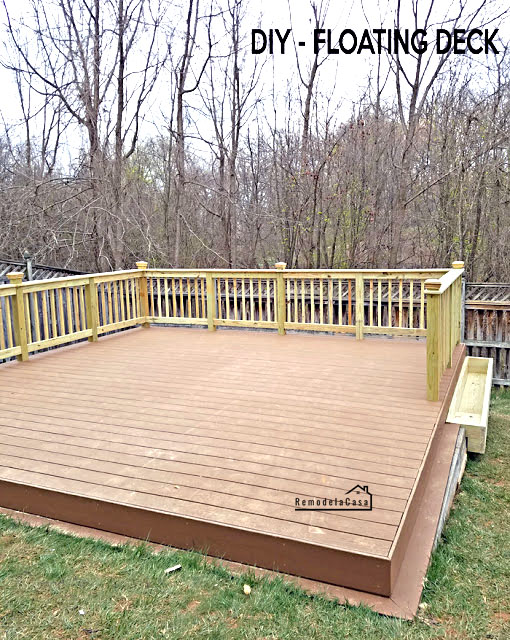
The deck was a big project conformed of many little projects that for the most part got lost, as it usually happens when something is done against time.
However, today's post wasn't one of those forgotten projects thanks to Kate, a dear reader who wanted to know how those lights were attached, and well, here's the answer in case you'd also wondered about it.
*This post contains affiliate links for your convenience. Click here to read my full disclosure policy.
First, let me go back to the initial deck building plan. --->
That plan included a privacy screen and some high posts that I was going to use to decorate with lights, flower baskets, flags, etc. Well, as I told you before, the HOA didn't approve that plan. I had to take plan B --> a simple railing around the deck. :/
At the time, I wasn't too happy with the change in plans, but now I think it was a good decision, those 4 x 4 posts were massive!
Time flew by and I found myself adding all the decor pieces and getting everything ready for the deck's final reveal - photoshoot, but something was missing... The lights!
Yes indeed, lighting is so important! I stopped everything, went to the Home Depot, and came back home with three electrical conduit metal poles like the one in the picture below.
As soon as I got back home I spray painted them black and gave them to Mr. RLC to install in the corners of the deck. I still had a gazillion things to do, and luckily he did a super job installing the lights. ;)
The materials you will need:
I'm sure you already noticed my lousy paint job on those poles. :D
Screw eyes were added at the top of the pole to hold the S hooks on which the string lights hang from.
He drove two screw eyes to have two options for the height of the light.
Although, Imho, hanging the lights at the very top looks way better. ;)
It is a very easy and inexpensive way to add lights to your outdoor space and it's been functioning without any problems for a few years already.
And the poles are hardly noticeable from a distance.
The umbrella is the other source of lighting that I'm loving!
They truly create a magical atmosphere!
For more DIY patio Ideas check these out:
*This post contains affiliate links for your convenience. Click here to read my full disclosure policy.
First, let me go back to the initial deck building plan. --->
That plan included a privacy screen and some high posts that I was going to use to decorate with lights, flower baskets, flags, etc. Well, as I told you before, the HOA didn't approve that plan. I had to take plan B --> a simple railing around the deck. :/
At the time, I wasn't too happy with the change in plans, but now I think it was a good decision, those 4 x 4 posts were massive!
Time flew by and I found myself adding all the decor pieces and getting everything ready for the deck's final reveal - photoshoot, but something was missing... The lights!
Yes indeed, lighting is so important! I stopped everything, went to the Home Depot, and came back home with three electrical conduit metal poles like the one in the picture below.
As soon as I got back home I spray painted them black and gave them to Mr. RLC to install in the corners of the deck. I still had a gazillion things to do, and luckily he did a super job installing the lights. ;)
 | |
|
- EMT Conduit - ¾in. x 10 ft.
- Metallic tube two-hole straps
- S Hooks
- Screw Eyes
- Black spray paint
- Outdoor String Lights
- Extension cord
Well, Mr. RLC takes his time when he's assigned a project like this. Precision is his main goal, even though he can't take good measurements. :D
However, he's passionate about safety, if something calls for two screws, he drives four, just in case. ;)
The picture above shows you how he secured the metal pole to the deck. Those metal straps were repurposed pieces from a trampoline we had disassembled. They were, in Mr. RLC's mind, stronger than these regular straps I'm recommending:
 | |
|
Screw eyes were added at the top of the pole to hold the S hooks on which the string lights hang from.
He drove two screw eyes to have two options for the height of the light.
Although, Imho, hanging the lights at the very top looks way better. ;)
 |
| | DIY - Outdoor Serving Cart | Nesting Tables | |
The umbrella is the other source of lighting that I'm loving!
They truly create a magical atmosphere!
 |
| | Patio Set | Rug | Patio Umbrella | |
For more DIY patio Ideas check these out:


I just love your new patio, but the lights make it magical. If I can ever get Mr TCP focused on doing this, I'll make sure he reads this post first! LOL... Hope you and the family enjoy loads of quality time on you new patio. It's amazing! Congrats on a fab challenge! Susie from The Chelsea Project
ReplyDeleteOh, your backyard with that beautiful fireplace and string lights would be a dreamy space! That's an easy job for the mirster. ;) Thanks for stopping by and for your kind words, Susie!
DeleteI love outdoor lighting! We added them to our pavilion last fall and they do create a magical space! I bet you'll make lots of great memories out there this summer!
ReplyDeleteThanks Sheila! yes, if we have good weather, evening time is spend right here!
DeleteLights make everything better - even your DIY projects, if that's even possible Cristina. Great space, and I'm sure your family will get many happy returns for your investment out there. Happy Mother's Day weekend!
ReplyDeleteRita
Love this idea. We were just talking last night about adding lights to the patio. I may have to give this idea a try. Thanks for sharing. Visiting from the BFF link up.
ReplyDeletelooks so great! We're working on our deck now; can't wait to get done with the boring, hard stuff and to the part where I get to decorate and hang up lights :)
ReplyDeleteI've been looking into the solar lights that I've seen in Facebook ads - but I really like what you've done here. Thanks for sharing!
ReplyDeleteFound you through BNOTP.
What an awesome space! I wouldn't want to go back inside.
ReplyDeleteGreat idea and I love how easy it is to add.
ReplyDeleteI love your deck and the lights! I've been wondering how to string lights when I don't have any poles to attach them to.
ReplyDelete:) gwingal
I'm so glad you wrote this post - I needed all the details. Such a great, simple idea (I'm totally going to copy it in my own backyard!). xx
ReplyDeleteThis looks so magical Cristina! I love that your hubby is a safety guy and makes sure everything is well battened down! My kids and I did something similar for our patio, using wood, but I love the idea of the conduit that seems to blend in with your woods!
ReplyDeleteThanks for this great tutorial! I just did this on my deck and I love it!! ❤️
ReplyDelete