Thanks so much for your kind comments on my previous post, the Fall Home Tour! They really made my week. :)
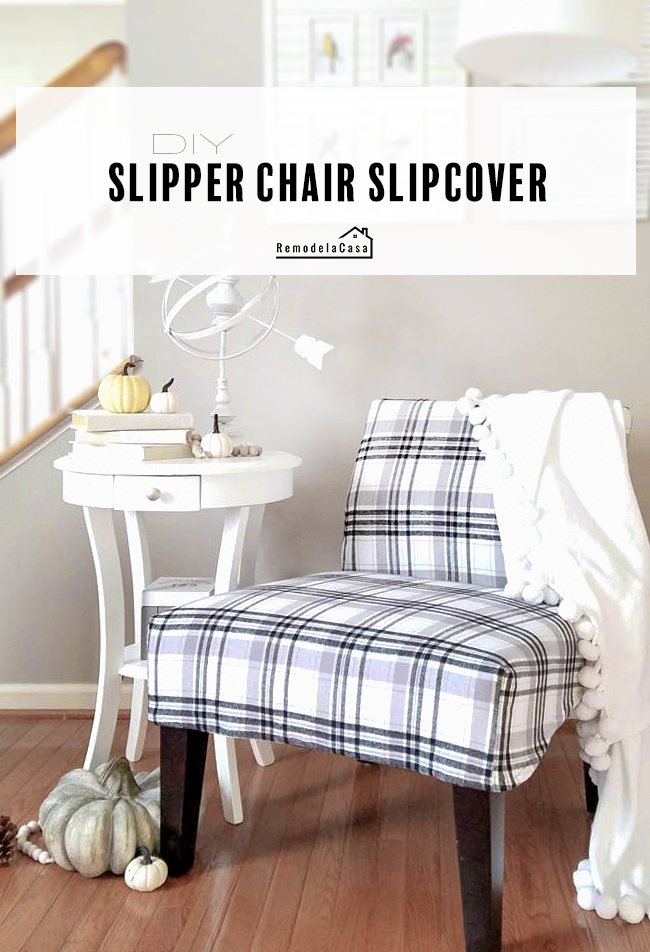
As I told you in that post, I got three yards of fabric, dusted the cobwebs from my sewing machine, and in one afternoon gave a couple of slipper chairs a cute makeover.
I'm giving you some tips on how to do it, it sounds complicated but it isn't.
If sewing is not your thing, I totally understand. I'll return with something that's not sewing related in my next post.
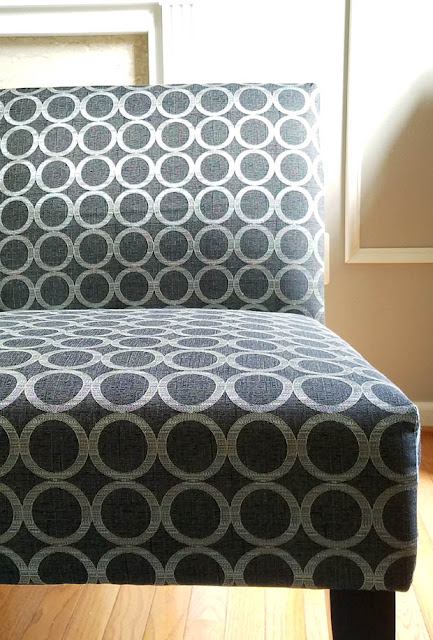
This is one of the chairs with its original fabric.
*This post contains affiliate links for your convenience. Click here to read my full disclosure policy.
I bought the slipper chairs at Target about five years ago. I didn't like that fabric, but I didn't bother. Their price was cheaper than other same-model chairs with different patterns, I knew I was going to cover them with slips.
Ha, they still look new, the slips have protected them!
 |
| Grey Slips | White Slips |
Sure enough, as soon as the chairs arrived, I sewed a couple of slips, left pic above.
I got tired of the grey color; but instead of grabbing the sewing machine, I simply turned the slips inside out, and Voila! I got a new white set. :D
You can see the corner seams but hey, it wasn't that bad.
I decided to sew a new set of slips to give the chairs another look, and I'm giving you some tips on how to make an easy slipcover in case you have this kind of chair or a similar one.
For this chair you only need these FOUR pieces of fabric:
In my opinion, the most important pieces are the two narrow sides. When I made the first slips I remembered that I created paper patterns, it was easier that way. This time, I did the marks directly on the fabric as you see above.
The cutting has to be done on the outside of the markings, about ¼" to ½" for the seams. (try not to use a pen, the pic below shows you some of those markings :/ )
The second step is to add the long piece of fabric to those sides (I like that the long piece of fabric is the same width for both, the front and back).
Remember to leave the extra fabric for the seam at the lower part of the back of the chair (about 1").
For the front part, I usually give three extra inches to tuck them in the chair and keep the slip in place.
I usually pin that big piece of fabric to the narrow sides and start sewing it from the very top of the narrow sides down to the back. And then again, from the top center of the narrow side, down to the front part.
For this chair you only need these FOUR pieces of fabric:
- Two narrow sides.
- One long piece that covers the front and back of the chair, and
- One piece of fabric for the seat.
In my opinion, the most important pieces are the two narrow sides. When I made the first slips I remembered that I created paper patterns, it was easier that way. This time, I did the marks directly on the fabric as you see above.
The cutting has to be done on the outside of the markings, about ¼" to ½" for the seams. (try not to use a pen, the pic below shows you some of those markings :/ )
The second step is to add the long piece of fabric to those sides (I like that the long piece of fabric is the same width for both, the front and back).
Remember to leave the extra fabric for the seam at the lower part of the back of the chair (about 1").
For the front part, I usually give three extra inches to tuck them in the chair and keep the slip in place.
I usually pin that big piece of fabric to the narrow sides and start sewing it from the very top of the narrow sides down to the back. And then again, from the top center of the narrow side, down to the front part.
But on this side (the front part), only sew until reaching a bit lower the top of the seat, not all the way down, because that's the part where the seat part reaches the back of the chair. (I hope that makes sense).
 |
| Well, here are those extra three or four inches of fabric and how they get tucked inside the chair. |
The next part is attaching the seat piece of fabric to the one that covers the front and back of the chair.
Center that piece of fabric and make sure it covers the chair on both sides and front, and leave enough material for seams too.
Pin the seat piece to the FRONT part and sew it.
Center that piece of fabric and make sure it covers the chair on both sides and front, and leave enough material for seams too.
Pin the seat piece to the FRONT part and sew it.
Bring the almost-done slip to the chair and adjust that tricky side part where the narrow sides connect to the sides of the seat. I usually pin those two parts right there while fitting them on the chairs and bring it to the sewing machine after making sure they have a nice fit.
The extra piece of fabric that gets tucked in the chair is the trickiest part. I just folded it and all those plaids got sewn together.
Find the corner points at the front of the chair seat, tuck in those corners, and sew a line from the corner down.
The final part is to trim the fabric all around the bottom and do a double seam all around.
Again, it sounds complicated but it is not. The awesome part is that you end up with a new piece of furniture!
It was a happy mistake.
While at the store I only bought 3 yards of fabric for both chairs. I used every single bit, trying to match the lines the best I could, but it wasn't enough. I went looking thru my stash of remnant pieces of fabric and this black one was the one that fit.
By the way, the fabric is JAFT PLAID BRUSH COTTON B I bought it over at Jo-Ann Fabrics, and the total price I paid for the three yards including coupons was $23.
Well, they're now flanking the fireplace in the family room, you can see them right HERE. I'm loving the new look they give to the room.
Are you ready to give them a try? My best piece of advice if you're starting on a project like this is: get a plain fabric, something you don't need to match patterns. ;)
For more DIY Home Decor Ideas check these out:


Cristina, I gotta hand it to you. Matching your plaid on the sides is the first thing i looked for, and what really makes this finished job look professional. I know how to sew, but don't enjoy spending the time on it like I did when I was a teenager, making myself clothes. It is things like that - taking time to match patterns, clean lines, etc - that really set your work apart from the masses. You always do such a fine job with your projects, and I love your work. Kudos. Great, versatile chairs. Have a great weekend.
ReplyDeleteRita
Oh Rita, that's very kind of you! The perfectionist in me is always looking at all those little details and trying to get better each day.
DeleteI admire people who sew clothes, I can't do that! I only sew for the home, and I prefer straight lines! :)
Again, thanks so much for your kind words, they mean a lot!
XOXO
seriously, is there anything you can't do?
ReplyDeleteHehe Thanks Karen! I try to give everything a chance. Things that have been tough to learn though, are html and electricity. Boy of boy, still a loooong way to go on those!
DeleteFABULOUS JOB. Love them and great tutorial too.
ReplyDeleteThanks so much Marty!
DeleteBeautiful!! I've got a Craft Gossip post scheduled for later today that features your slipcover: http://sewing.craftgossip.com/?p=89717 --Anne
ReplyDeleteOh how nice, thanks Anne!
DeleteI can't believe you made these slip covers Cristina! Fantastic job!
ReplyDeleteThanks Vel!
DeleteYou're now classified as an accomplished seamstress! Matching plaid is a pain, but oh so worth it for a professional finish. Ine day I will send you a pick of the chair I need to recover and get your thoughts about doing it ... I am overwhelmed when I consider it!
ReplyDeleteOne day and pic ... yeesh!
DeleteHehe that's a big title! :) Somehow the matching part was kind of easy because first - lines are easy to match, and second- the width of the chair (front and sides) was almost exactly the same width of the fabric. It was a lucky break I guess.
DeleteSend me the pic, Guerrina. Have you considered upholstering it?
The chairs look great and I have to agree that we want change after a while and this is the easiest and most cost effective way to do it. Love the back in the back, it's a nice surprise.
ReplyDeleteIf only I knew how to sew! :( you're making me want to learn though! :)
ReplyDeleteI need to try this. I have a chair that I hate and a slip cover might just be the trick! Thanks!PINNED!
ReplyDeleteThe plaid looks great with the black contrasting fabric. You have sure gotten your money's worth out of those chairs!
ReplyDeleteYou did a fabulous job. I love the black plaid with the plain black back. Looks terrific.
ReplyDeleteCristina,
ReplyDeleteWonderful job! Your chairs look so much more expensive than what you've invested in them. The black and white plaid fabric eye catching and has more style than the gray fabric. Thank you for sharing your tips at Monday Social.
Judith
Cristina, you did an amazing job!! I wouldn't even know where to begin!! LOL!!!
ReplyDeleteCristina, I have the exact same chair and same problem with fabric. Could you make me a pair and charge me?
ReplyDeleteCristina, I have the exact same chair and same problem with fabric. Could you make me a pair and charge me?
ReplyDeletethank you for sharing your gorgeous tutorial. I actually have a chair ready for a recover. It has been staring at me for months ( wunk) Pinned Hugs! P.S> please share at my TFT party.
ReplyDelete