Do you have a monster inside a closet? I do.
My bedroom closet is a disaster. I don't even want to go there and face it yet.
I had another one. Not as big or as scary as the one upstairs in my bedroom, nah! But nonetheless a monster. I did face it, and it wasn't that big of a deal to get rid of it.
My foyer closet was that little monster that you don't want to see every day, but it happens to be right there where you have to constantly go through, you just can't ignore it! It had nothing special, just a boring little closet that needed a good coat of paint and a tiny dose of organization.
This is just the way it stayed for more than 10 years. Of course, after all that time it deserves some attention. Besides, if the door happens to be open when visitors come to my house, that's the first thing they get to see.
So, it needed paint, and paint I gave it, ;)
Only one coat of white paint made it look good already.
Buuuut... Still boring :/
You know I want things a little more involved.
I decided to paint this design on the back wall to get it out of the boring stage.
The materials you'll need:
1" painters tape
Measuring tape
Level
Utility knife (with a sharp blade to cut the tape)
Paint
After the white paint dried, I began placing the horizontal lines, then the vertical lines, and cutting the excess tape.
Then, the center square was taped.
Once all the design is taped, you need to apply another coat of the same color paint you already applied to the wall. In my case, one more coat of white all around, and on top of the tape to seal it, let it dry. That prevents the top paint color seeping through the tape and not getting sharp lines on your design.
After it dries you can begin applying the top coat. I used the same grey color I'm using around my house. Sherwim Williams Requisite Gray.
Before it dries completely, remove the tape.
I love the design, it was fairly easy do to and economical, besides it draws so much attention to this little space. But I was not happy with that shelf.
And yes, I went for change ;)
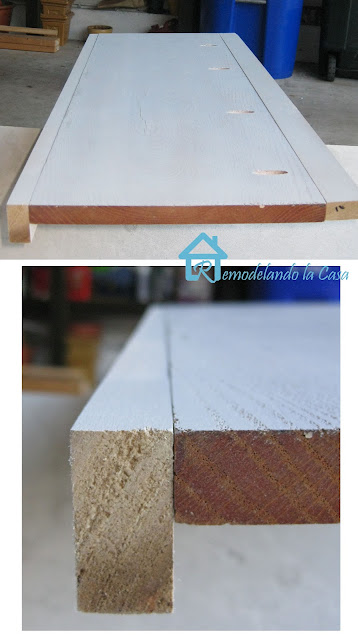
I put together some pieces of wood I had in my leftover stash and Voila! A better looking shelf was created. Notice how the front board has to be attached to make it look chunkier.
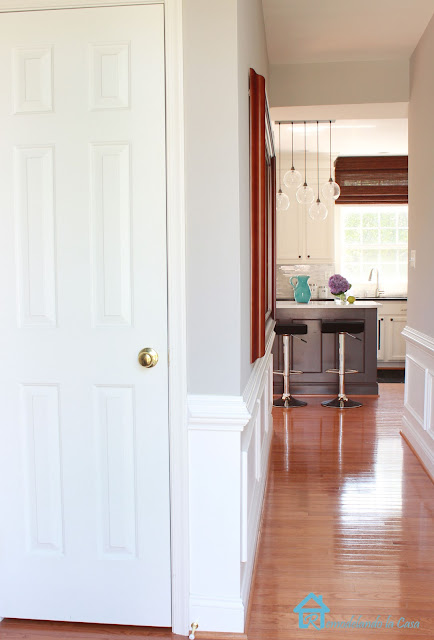
And now I LOVE it! It goes way better with the other spaces, specially the kitchen at the far end.
Time to put it to good use!
Some low hooks for my little Mister to hang his stuff!
A new re-purposed rod, gives company to the newly built shelf.
I'm not scare of opening that door anymore. :)
In fact, I like it better when the door is open.
A wider view from the main entrance door.


This is such a great idea!! Thanks for your tip of painting over the tape first with the bottom color - I always wondered how those lines came out so clean and sharp! Looks awesome!
ReplyDeleteLove everything you do! If you like the door open better, you should check out House of Smiths entry closet makeover. I think I might try your paint treatment on my bedroom wall!
ReplyDeleteYou have such incredible ideas!! I love the painting idea. You are such a talented painter. :) Megan
ReplyDeleteCristina- THAT looks great. I love the color and the design is just wonderful. Blessings to you and I hope you have a wonderful weekend- xo Diana
ReplyDeleteYour closet looks as terrific as the rest of your house! So clever! Love it!
ReplyDeleteSuch a neat idea Cristina! Love the design and that gray paint is fab!
ReplyDeleteThis comment has been removed by the author.
ReplyDeleteThat looks just like our wall!!! http://akadesign.ca/?p=1339 :) Ours is even grey and white! Looks great in your closet!
ReplyDeletexo,
Shannon
Love the wall design you created! Looks very chic and elegant!
ReplyDeleteSuch a great make over for a such a tiny space. Thanks for the painting tips too! If you're looking for another place to share your creative projects, check out Etcetorize. Party starts later tonight..would love to see you there!
ReplyDeleteI love the design.
ReplyDeleteyou made that look so stinking easy! that's fabulous!
ReplyDeleteYour closet is now a work of art :)
ReplyDeleteDee
Great idea. Looks fabulous!
ReplyDeleteYou've tamed the monster! That is the snazziest closet I've ever seen!!
ReplyDeleteKelly
Cutest closet ever! Thanks for those great painting tips. I have never heard of adding another coat of paint to seal the painters tape...genius! I saw your post over at "Cowgirl Up!"
ReplyDeleteYou always have the best ideas! Thanks for sharing again at Cowgirl Up! I loved your closet so much-- I featured it on my fb page :)
ReplyDeletehttps://www.facebook.com/pages/Crafty-Texas-Girls/140299076008437
:) Samantha @ Crafty Texas Girls
I found you via My Uncommon Slice of Surburbia. LOVE the closet design, it looks fabulous and simple!
ReplyDeleteI love this. Very clean design.
ReplyDeleteWhat a fabulous closet. I love the painting and the design. This is just unreal. Thanks for joining TTT. Hugs, Marty
ReplyDeleteI think I'd be taking that door off the hinges so I could see that beautiful wall all the time. Dynamite!
ReplyDeleteWhat a fun pattern this is, it would have taken you ages to do Im sure. Its almost a shame to have it covered up but then its a good incentive to keep the cupboard clean so you can see the pattern :)
ReplyDeleteSuper cool Christina! I love it ... plus now it's incentive to keep it clean and uncluttered so that you can see the awesome design you painted on it!
ReplyDelete:)
Linda
Oh my gosh! I love that you did it without a stencil.. but it looks like you had a stencil! I can't wait to copy this! :D
ReplyDeletePerfection! Featuring you tomorrow!
ReplyDeleteXO, Aimee
That is such a nice closet. I wish you would come do mine. They are all awful. Glad they have doors to cover the mess. Featuring this at the next party.
ReplyDeleteWow, that has to be the cutest closet ever! What a nice surprise! I bet it makes you smile every time you open the door!
ReplyDeleteCristina! It's gorgeous! Great job!
ReplyDeleteI absolutly love this project! Thanks for linking up.
ReplyDeleteXO
Kristin
What a great stencil idea! I love it!
ReplyDeleteThis is so great! I love the geometric design - it is by far too pretty to hide it in a closet ;-)
ReplyDeletePinning this for future projects.
xo Anja
I love this design! I actually just bought curtains for my TV room with the same pattern on them. Painting the interior of the closet is such a great idea!
ReplyDelete