As I mentioned before, last weekend I was very busy. It began with a walk to the Flea Market, you can see my finds HERE.
With such a beautiful day we were having, we set to work on our front yard. I snapped a picture. From that distance, it looks OK, right? Perhaps a bit boring, but up close, you can see the problems.
There were many little (and big), things to do so, I made a list.
*This post contains affiliate links.
- Remove dead plants that remained over winter.
- Remove rust stains on concrete.
- Remove rust from the metal railing before painting it.
- Trim the Boxwood bushes.
- Fill up empty spaces in the garden by dividing some plants.
- Give some color by planting some annuals all around.
- Take care of paint peeling off from door trim.
Not a pretty color either.
Rusty all around.
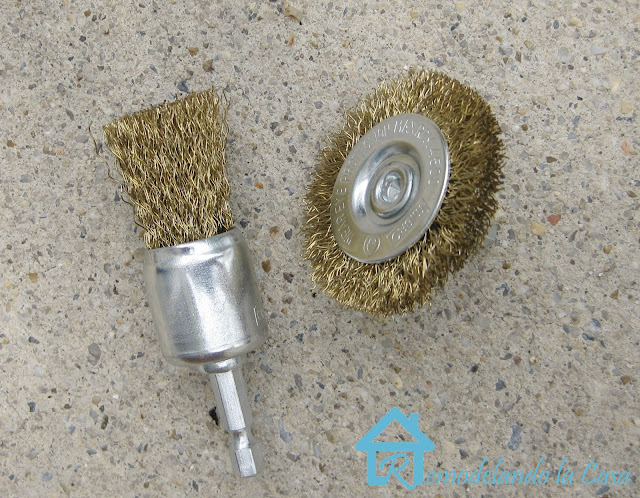
Our weapon against all that rust???
Yes! these wire brushes that you attach to a power drill. These small ones are for hard-to-reach places.
 |
| | Wire Brush Drill Attachment | |
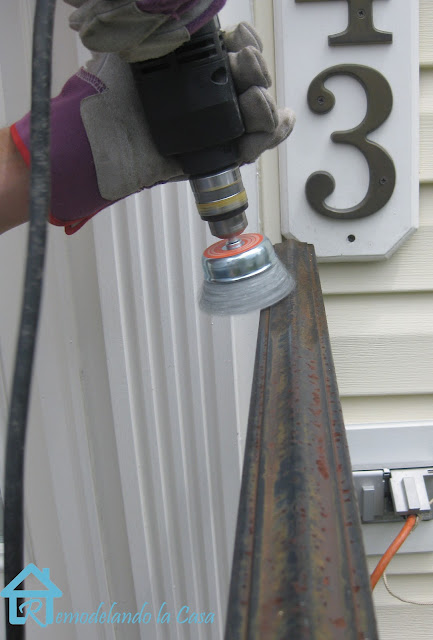
....and I am talking about WE! because this job of getting rid of the rust was taken by no other than Mr. G ;) Besides, he volunteered to do it (like four years ago, though) and he took the responsibility for it all.
I like how well he prepared himself. Safety first. Gloves, safety goggles, and a mask are essential to protect yourself from the little particles flying away. He spent like 2 hours, including coffee breaks, to finish the job.
You can see immediate results. This is the same rail just sanded. It needs to be done this well for the rust to stop.
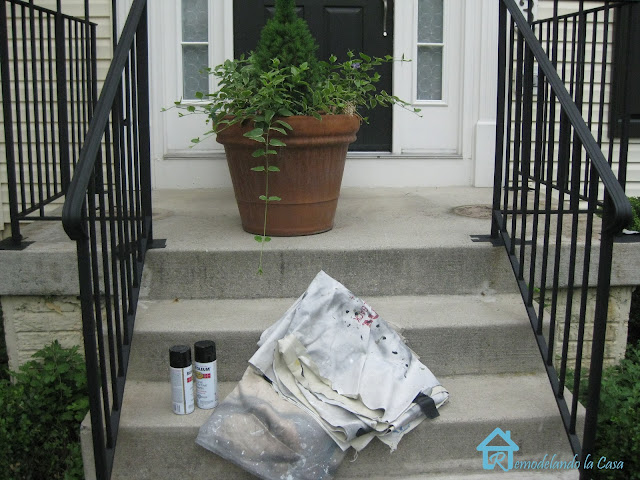
With his job done, it was now my turn to prime and paint. For Priming, I used Rust Reformer (specially formulated to stop rust) and for painting, I used a Protective Black Enamel on a Gloss finish, both products by Rust-Oleum.
 |
| | Rust-Oleum Rust Reformer | Rust-Oleum Gloss Protective Enamel Black | |
After covering the surfaces that we didn't want to spray, I began using the spray primer. Notice how nice those bushes were already looking and no more dead plants insight.
I continued applying the primer, but oh Lord! I need to invest in one of those spray adapters you attach to these cans because at the end of the day I couldn't point at anything. My finger was so sore!
One side primed, the other one sanded. It was getting dark, but I wanted to finish priming.
Both sides are primed and ready to be painted after waiting 24 hours for the primer to set.
Which side is Painted and which one is just Primed?
 |
| You guessed it right! The right side is the one already painted. You can tell by how shiny it looks. |
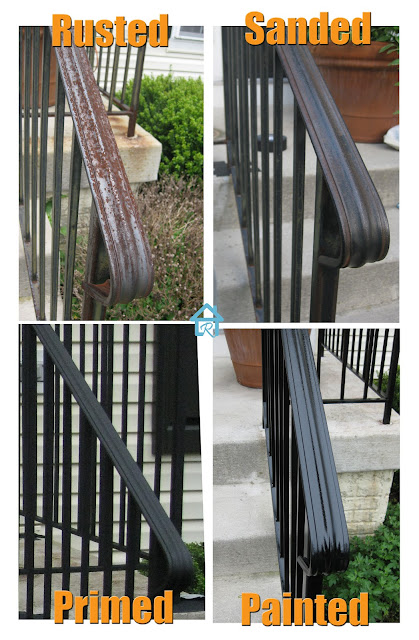
And here, you can see the difference pretty well between each step.
I love the end result!
Looking at the yard from far away, again, is not that big of a difference, but during the two hours the mister was there sanding the railing, I managed to:
- Clean the yard, dead plants and weeds are gone.
- Trim the Boxwood bushes.
- Divided two plants and planted them in empty spots. I even managed to give the edge a pristine, sharp look. ;)
It was a lot of work, it doesn't show that much, but we are happy with a job well done.
Next weekend we're going to deal with the remaining issues. Planting some flowers will be the sure way to brighten up the space.
Until next time!


Yay for teamwork! You guys did a great job on your railings. They look brand new!
ReplyDeleteOur railings are getting so rusty, too. I'm going to have to give this a try. Yours look fantastic!
ReplyDeleteLooks Great! I love how you say Mr. G volunteered for the job four years ago... I'm still waiting for some projects to get finished!
ReplyDeleteWe've got really similar railings. I think we can get one more season out of ours but they are going to need a paint job next year. Well done, they look great!
ReplyDeleteChristina, you guys did a fabulous job! Your front entrance looks amazing! So clean and shiny!
ReplyDeleteLooks great, the railing looks brandnew and love how you trimmed everything! You can tell the difference!
ReplyDeleteWow- That is a big job and well done! It is looking really good and you did a wonderful job. Now...what time did you think you might pop by to help me? xo Diana
ReplyDeleteHi Christina, I am so glad you stopped by Behind the Gate and I had the opportunity to meet you. Love your blog, I adore decorating. Oh my...what an incredible job you did! You are motivating me to get to it tomorrow. When I took pictures tonight of the flowers I saw SO MUCH that needed doing. Bit by bit...
ReplyDeleteHave a wonderful weekend,
Gayle
Hi Christina, I am so glad you stopped by Behind the Gate and I had the opportunity to meet you. Love your blog, I adore decorating. Oh my...what an incredible job you did! You are motivating me to get to it tomorrow. When I took pictures tonight of the flowers I saw SO MUCH that needed doing. Bit by bit...
ReplyDeleteHave a wonderful weekend,
Gayle
It looks amazing! you're my idol, i need to get around to do my railings as they are rusty too!
ReplyDeleteIt looks fantastic you did a great job.
ReplyDeleteCynthia
Oh my, beautiful. Everything looks fabulous. Beautiful home. Thanks for joining TTT. Hugs, Marty
ReplyDeleteIt looks amazing!!! A lot of work but really worth it!! Thanks so much for sharing and I am a new follower!
ReplyDeleteHope you have a great day!
Michelle
www.delicateconstruction.com
Great job! Seriously yards and entrance/exit areas are so much work! But they look great when they're done! Yours is looking great!
ReplyDelete--Katie
Your railing now looks like new! And you'll be all ready for summer with a great looking yard!
ReplyDeleteYou did a fabulous job! I have an iron fence that needs some serious power tool attention. I tried to short cut it but up close it looks crummy and lumpy ...
ReplyDelete... I'll just add that to my to do list again ...
... so happy you shared with us at our Great Outdoors link party!
:)
Linda
Wow, that has to be so rewarding. So amazing what a little paint can do ... along with a lot of sanding, of course. haha Thank you so much for sharing at our party!
ReplyDeleteKarah
It's all about first impressions - and that railing looks great (don't have to worry about asking your guests to get tetnus shots now)! My friend has the same rusty railing - I'm going to tell her how you did it with the sander!
ReplyDeleteYour to-do list exhausts me but I know you'll make it fabulous!
Glad you joined our party.
Kelly
Nice post and really very informative one about removing rust from fencing. as a tata wire fencing work provider i'm very happy to see this kind of post.
ReplyDeleteNice article. I like your blog. This ideas are useful to make my home look new. Thanks for sharing.
ReplyDeleteelectrical maintenance in chennai