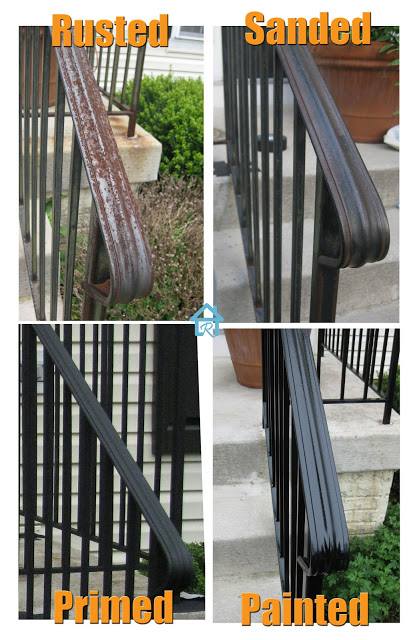
It was like three years ago that I scored an old, rusty wrought-iron patio set. I was thinking on updating my backyard so, a free patio set sounded like a good choice, not much money to spend buying furniture and instead I could use said money to give the backyard a good makeover.
Ha, it didn't happen as fast as my mind wanted it! More than three years after I got the set, it still looked that bad or even worse than when I got it, as you can see in the picture below.
It was only until this year's Patio Style Challenge that I was pushed to give new life to my backyard and the patio set.
The paint treatment on all the chairs was crackling this bad! There were many layers of paint that needed to be removed or at least leveled up.
This is a somewhat economic makeover that requires lots of elbow grease.
I worked one chair at a time, sometimes waiting a couple of weeks in between each chair, so not to get overwhelmed with this project. It was done and I'm now happy with the beautiful set I ended up with.
The materials: (Affiliate links for your convenience.)
- Scraper
- Drill
- Wire brush attachment for drill
- Gloves
- Safety Glasses
- Respirator mask
- Rust-Oleum Rust Reformer
- Black spray paint
- Clear Polyurhetane
- Drop cloth
Directions:
Safety first: Use gloves, safety glasses and even a respirator mask. Small pieces of paint are going to fly everywhere! Protect your floors and work in a well ventilated area.
1. Using the scraper, remove all the loose pieces of paint from chairs and table.
2. Using the drill and a wire brush attachment continue the removal of the old paint and rust. This part takes time. But, removing all those loose parts and getting rid of the rust will ensure the new paint treatment will have clean surface to grab from.
This is all the dirt from only one chair.
Once you're done removing all you can remove of the old paint and rust, clean the chair very well. I washed it and let it dry thoroughly before moving onto the next step.
3. Use Rust-Oleum Rust Reformer to spray paint the chair. As the product states, a layer of this flat-black coating bonds with rusty metal and instantly transforms it into a non-rusting surface. No need to sand down to bare metal.
4. Spray paint you chair in your color of choice. I used a glossy black finish for all my patio set.
5. Give each of the pieces one or two coats of clear poly for more protection.
All the chairs and table were painted the exact same way.
I removed the table's legs and tried to also remove the glass but it was impossible. I didn't want to brake it.
Here you can see the difference between the primed and painted surfaces.
In order to protect the glass from being spray painted, I held a piece of cardboard, following the curvature of the table while painting the edge.
It worked like a charm! :)
As a final detail I added jute rope to the edge of the table.
Ha, who knew it could look this good! It seems like a brand new set. :)
For more Home DIY ideas check these out:
*This post contains affiliate links.*


Love how this turned out.
ReplyDeleteThanks Marty!
DeleteOye! What a project! A tough one --to be sure. The Ryobi drill worked great on the rust. And the Rustoleum paint! WOW.. Looks like new. Your staging is also so fresh and fun. Another great makeover!! Enjoy :-) XO Susie from The Chelsea Project
ReplyDeletePower tools always speed up the process, and the rust reformer is really the best defense against rust. I'm loving my new set! 😁
DeleteOh I can't imagine the amount of work you put in! That set was in bad shape but it turned out beautifully! Love the added jute rope detail!
ReplyDeleteThanks for showing us how to do this! My parents gave my husband and I a large patio table for our deck (we'll take free any day!) and it desperately needs repainting because the paint is coming off and it just looks terrible-this tutorial made it seem much less daunting!
ReplyDeletexoxo, SS
www.SouthernAndStyle.com
Amazing transformation!
ReplyDeleteLove reading your posts, but for some reason just about every time I try to read them, a pop up occurs that makes it practically impossible to read. Wondering if it's your side or mine?
ReplyDeleteHmmm thanks for letting me know. I hate pop up ads and don't allow them, but I'm gonna check again just to be sure it isn't on my part. Thanks for stopping by!
DeleteWow, the final result is really impressive! Love the sea details.
ReplyDeleteI have a similar project waiting for me ~ two very rusty wrought iron bar stools. I have been putting off re-finishing them, but you have given me the inspiration I need. Thanks!!
ReplyDeleteLove,
Susan and Bentley
Wow, what a transformation! Looks great. :)
ReplyDeleteWow -what a difference - looks GREAT!
ReplyDeletePlease come share your transformation at Reader Tip Tuesday: http://www.jodiefitz.com/2017/08/15/reader-tip-tuesday-craft-recipe-party/
Love the colorful setting too! xo
What a beautiful transformation!
ReplyDelete