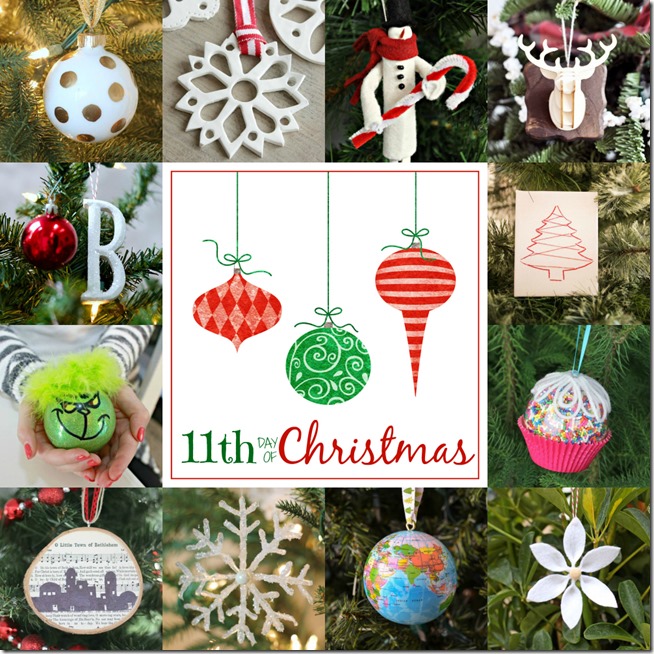
Only one more day to go, people! They say time flies when you're having fun and it's true. It looks like it was just yesterday that we began this series and here we are, finishing things up. Well, still one day left. ;)
It was lots of fun, but you know what? it's tiresome!
Lots of ornaments, pictures taken, edited, and written posts.
Pfff! By day nine my body was feeling it. That's why an assistant was called.
This, the day 11th Ornament was done by none other than Mrs.RLC, my daughter. Working with clay is one of her passions, and she was glad to give me a helping hand with this project. ;)
The materials you'll need:
Instructions
Grab a big slab of clay and roll it flat, she uses a "clay pasta machine" to make it really flat but you can use a rolling pin. Take one of the biggest cutters and cut out its shape. You can make your own designs by first tracing them on the clay and then cutting them out using the X-Acto knife as she did here.
Using the smaller cutters, cut out the inner designs. She used a straw to make the smallest circles, like the ones for hanging the ornaments.
Once you have a good amount of snowflakes, place them on a baking dish and bake them at 275°F for 15 minutes, but always follow your polymer clay baking directions.
Once cool, you can sand the edges and they're done. You can even paint them to your liking.
Since I only asked for snowflakes they were left white, but she made some of her own that she was planning on painting.
The design possibilities are endless.
You should really give them a try, they're very easy to make.
Don't forget to visit my blogging friends for more Christmas crafting ideas.
For more Handmade Christmas Ornaments check these out:
This, the day 11th Ornament was done by none other than Mrs.RLC, my daughter. Working with clay is one of her passions, and she was glad to give me a helping hand with this project. ;)
*This post contains affiliate links for your convenience. Click here to read my full disclosure policy.
The materials you'll need:
- White Polymer clay
- X-Acto knife
- Shape cutters (big sizes for the flake shape and very small sizes for inner cut outs)
- Straw
Instructions
Grab a big slab of clay and roll it flat, she uses a "clay pasta machine" to make it really flat but you can use a rolling pin. Take one of the biggest cutters and cut out its shape. You can make your own designs by first tracing them on the clay and then cutting them out using the X-Acto knife as she did here.
Using the smaller cutters, cut out the inner designs. She used a straw to make the smallest circles, like the ones for hanging the ornaments.
Once you have a good amount of snowflakes, place them on a baking dish and bake them at 275°F for 15 minutes, but always follow your polymer clay baking directions.
Once cool, you can sand the edges and they're done. You can even paint them to your liking.
Since I only asked for snowflakes they were left white, but she made some of her own that she was planning on painting.
The design possibilities are endless.
You should really give them a try, they're very easy to make.
Don't forget to visit my blogging friends for more Christmas crafting ideas.
Gold Leaf Polka Dot Ornament | The Happier Homemaker
Polymer Clay Snowflake Ornament | Remodelando la Casa
Clothes Pin Snowman Ornament | Serendipity Refined
3D Deer Head Ornament | Cherished Bliss
Glitter Monogram Ornament | It All Started With Paint
Simple Canvas Tree Ornament | Bigger Than The Three of Us
Painted Grinch Ornament | Mom 4 Real
Cupcake Sprinkles Ornament | All Things G&D
O Little Town of Bethlehem Ornament | Lovely Etc
Frosted Hot Glue Snowflake | Thrifty and Chic
Globe Ornament | Whats Ur Home Story
Felt Flower Ornament | May Richer Fuller Be
Click on any of the pictures below to check my 12 Days of Christmas Ornaments.
 |  |  |  |
 |  |  |  |
 |  |  |  |
This post contains affiliate links.


Cristina these might just be my favorite of your series so far this year! My daughter loves that clay too (but getting her to actually finish a project is another story ;)). Beautiful cutouts and I love the white just as it is.
ReplyDeleteQue bonito y fácil !! Me encanta lo delicado de ese adorno
ReplyDeletePrecioso, me encanta el resultado de los adornos con la arcilla blanca.
ReplyDeleteSuch a talented girl......but we already knew who she got that from! These are simply adorable!
ReplyDeleteThese are beautiful!
ReplyDeletewhat a fun project
ReplyDeleteJust beautiful - where do you buy the little shape cutouts?
ReplyDeleteThanks Sschramp! We bought them at Michaels.
DeleteThank you! They're adorable!
DeleteCan you use snowflake cookie cutters & then cut them out w/ an X-Acto cutter?
ReplyDeleteYes, I think that would be a great option too.
Delete