The following day I tried to be more patient, but anyways the entire day was dedicated to learning and experimenting. Boy oh boy, I damaged a big amount of crown pieces.
Working with a miter box and a regular saw was not easy. Those corners somehow didn't match properly, and the worst were those inner corners. You quickly become to doubt your own sanity.
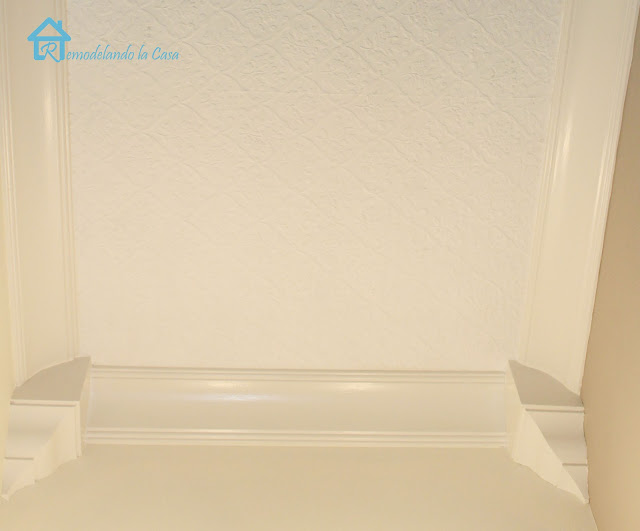
I fail miserably those two first times I tried to install crown molding. A good reminder of one of those lost battles is the crown corners I had to install in the small powder room. 😝
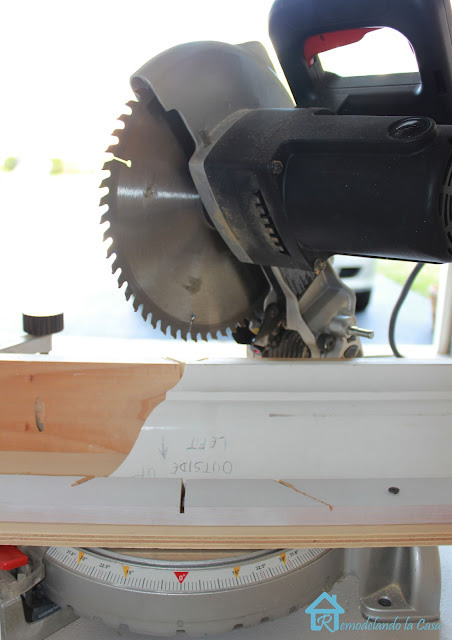
Before trying one more time I bought a miter saw, a cheap $99 miter saw I could afford, hoping that all the troubles I'd been having will disappear with this baby.
Making straight cuts was a breeze.
This cradle is attached to the saw's fence and it will aloud you to cut moldings upside down.
Two extra supports to each side of the cradle are necessary to keep it in place.
This jig was my crown corner lifesaver. However, a few times I got confused about how I should place the molding in it, and that's why I created a set of sample cuts to have at hand as a quick guide.
As you can see in the picture below, I made two sets.
The top set is for outside corners and the lower set is for inside-mitered corners.
For outside corners marking the long point will give you the most accurate measurement. You trace the top edge of a scrap of crown onto the ceiling on both sides of the corner, the intersection of the two lines is your measuring point.
Cutting an Outside Right Corner
Cutting an Outside Left Corner
You'll end up with this:
For inside corners, I prefer to cope the crown molding. You can do miter cuts but they usually open after some time.
Cutting an Inside Left Corner to be coped.
Coping Inside Corners
You cope a molding or shape it to match the profile of the one next to it. In my case, the piece of molding in the inside right corner is cut square and butts tight to the wall. The inside left cut (above) is going to leave you with this profile:
That end part of the crown molding needs to be coped. Begin by marking the edge of the cut with a pencil, which defines the profile.
Then, you need to use a coping saw to cut all along the profile line, back-cutting past 90 degrees, making sure the pieces of molding intersect along the profile line only.
Cutting in different directions is easier. Using a rasp you can fine-tune the cope at the end.
As I told you before, the right side of the inside corner is left square or butt. The left side of the inside corner is coped to fit snugly alongside.
Cutting crown moldings is not that big of a deal anymore. I already installed it in my daughter's bedroom, the kitchen cabinets, and up the fireplace, but there are still lots more rooms in my house that would benefit from this great way to give architectural interest to any space.
I hope the pictures can help you with your next crown project.
For more molding/trim projects check these out:
Before trying one more time I bought a miter saw, a cheap $99 miter saw I could afford, hoping that all the troubles I'd been having will disappear with this baby.
Ha, they didn't!
Sight.
Making straight cuts was a breeze.
The outside corners were OK.
Inside corners were still a nightmare! 😠
One of the hardest parts was trying to hold the long pieces of molding in place when I didn't have help.
Yes, the perfect solution to most of my troubles was to build a jig or cradle to hold the molding in place.
One of the hardest parts was trying to hold the long pieces of molding in place when I didn't have help.
THE SOLUTION
Yes, the perfect solution to most of my troubles was to build a jig or cradle to hold the molding in place.
Three pieces of wood were put together, the vertical surface represents the wall, the horizontal surface represents the ceiling, and one extra movable stopper (you can change its position depending on the material you're using).
This cradle is attached to the saw's fence and it will aloud you to cut moldings upside down.
Two extra supports to each side of the cradle are necessary to keep it in place.
This jig was my crown corner lifesaver. However, a few times I got confused about how I should place the molding in it, and that's why I created a set of sample cuts to have at hand as a quick guide.
As you can see in the picture below, I made two sets.
The top set is for outside corners and the lower set is for inside-mitered corners.
Using these samples as a quick reference before making the real cuts was priceless!
Having all the necessary elements to do a smooth job, these next pictures will show you how to cut those pesky corners.
OUTSIDE CORNERS
For outside corners marking the long point will give you the most accurate measurement. You trace the top edge of a scrap of crown onto the ceiling on both sides of the corner, the intersection of the two lines is your measuring point.
Cutting an Outside Right Corner
Cutting an Outside Left Corner
You'll end up with this:
INSIDE CORNERS
For inside corners, I prefer to cope the crown molding. You can do miter cuts but they usually open after some time.
Cutting an Inside Left Corner to be coped.
Coping Inside Corners
You cope a molding or shape it to match the profile of the one next to it. In my case, the piece of molding in the inside right corner is cut square and butts tight to the wall. The inside left cut (above) is going to leave you with this profile:
That end part of the crown molding needs to be coped. Begin by marking the edge of the cut with a pencil, which defines the profile.
Then, you need to use a coping saw to cut all along the profile line, back-cutting past 90 degrees, making sure the pieces of molding intersect along the profile line only.
Cutting in different directions is easier. Using a rasp you can fine-tune the cope at the end.
As I told you before, the right side of the inside corner is left square or butt. The left side of the inside corner is coped to fit snugly alongside.
Cutting crown moldings is not that big of a deal anymore. I already installed it in my daughter's bedroom, the kitchen cabinets, and up the fireplace, but there are still lots more rooms in my house that would benefit from this great way to give architectural interest to any space.
I hope the pictures can help you with your next crown project.
For more molding/trim projects check these out:


These are fantastic tips! I like how you wrote where each piece was going on the wood. Great idea. Pinning it now. :) Megan
ReplyDeleteHoly smokes....looks like a big puzzle. lol I always stay up late cutting molding, then I make a bunch of wrong cuts because it's late and my brain isn't working well. lol
ReplyDeleteLooks great! Fantastic tips :)
--Katie
You are one smart little cookie to do that yourself. . What a great tutorial you have here...so much help. I have a son that is good with it, too. xo Diana
ReplyDeletewe ahve done plenty of those ourselves...and I agree on those being a pain! great description!
ReplyDeleteThat is a great summary. I used to have a hard time, but once you do it over and over you can figure it out. I'm going to keep your cheat sheet on hand though! For sure.
ReplyDeleteGreat tutorial! I've not tackled crown molding yet, but I will definitely be referring back to this post. Thanks!
ReplyDeleteOh, yes! It is very hard! No matter how good your tools are! We have had our share of crown molding issues. Great tutorial! You are so brave! :)
ReplyDeleteOh my hubby is going to love this! Thanks so much!!
ReplyDeleteXO
Thank you so much for this sensible tutorial. Hubby might get his room finished yet!
ReplyDeleteGreat tips. Crown molding is almost a lost art.
ReplyDeleteI love the look and it really dresses up the room.
Dee
Great tips and beautiful inspiration! Thank you fro sharing your project at Potpourri Friday!
ReplyDeleteGreat tips! It's not one of my favorite projects. I like doing mitered cuts except when it comes to crown molding, then all of a sudden, I'm lost. Thanks for sharing!
ReplyDeleteGreat tips- you really know how to work a saw!!! Thanks for sharing!
ReplyDeleteLinking back from "My uncommon slice of suburbia"
Oh I tried to follow along ... really I did ... but then my head started to hurt! Your crown looks fabulous, though!
ReplyDelete:)
Linda
I pinned this for the future when I get brave enough to try my own...Thanks so much! I am your newest follower!
ReplyDeleteI haven't done crown yet, but will keep your directions handy. Thank you for explaining exactly what "coping" is. NOW I understand!
ReplyDeleteJust an fyi for those who have a small saw with a short fence or don't want to build a jig ... you can and actually SHOULD cut large crown moulding on the flat, which I find more accurate. The measurement are different though than when cutting against the fence: the miter is 31.6 degrees, and the bevel is set at 33.9 degrees. Then just adjust the miter left -31.6 or right 31.6 for the corners respectively. So easy and creates perfect fit joints.
ReplyDeleteThanks Everybody!
ReplyDeleteAnonymous, thank you so much for that info! Yes, large crown moulding cannot be cut that way, with a small saw like the one I have. I'm going to save your measurements for when I need to use them on large crown. Thanks!
Thanks for nice and useful post I am very impressed this blog
ReplyDeleteI have a question, do you know how tall your crown was that you used in the kitchen? We are getting ready to do ours but can't decide between the biggest and next sized one we have. Thanks!
ReplyDeleteCaryn